***This post will stay at the top of my Blog until the Blog Hop
Please scroll down for newer posts***
Please scroll down for newer posts***
Welcome to the IMAGINE Crafts and Viva Las VegaStamps! Blog Hop. For the next week, our two design teams will be featuring some amazing projects featuring products from both our companies. Amazing stamps require amazing ink, right?
Mixed Media Prize Package
We're proud to announce your chance to win one of three different Mixed Media Prize Packages from IMAGINE Crafts and Viva Las VegaStamps! You have until midnight PST on Sunday, May 31st 2014 to comment on as many of the Design Team Blog Posts from this week as possible. On Monday, June 1st we’ll draw three random blog posts and one comment from each of those posts will win a prize package!Ready for some inspiration from our artists?
Here's today's posts from IMAGINE Crafts:
And from Viva Las VegaStamps!:
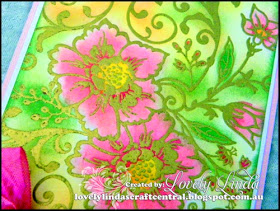
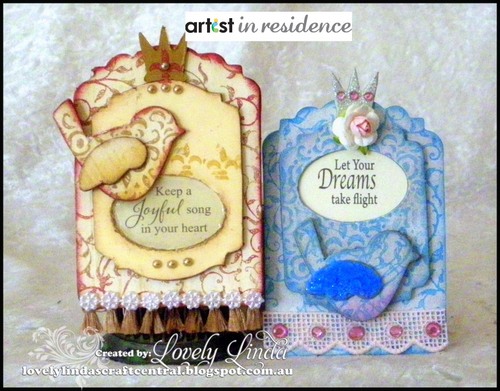
I have a project to share with you using stamps from Viva Las VegaStamps! and IMAGINE Crafts
divine inks.
Supplies:
- Imagine Crafts/Tsukineko: Memento™ Dye Ink in Bamboo Leaves, Dandelion and Tangelo; Sponge Daubers
- Viva Las VegaStamps! - stamp set
- Spellbinders: S5-192 Diamond Effects Nestabilities® Card Creator dies; S4-114 Standard Circles Nestabilities®; ES-013 Harlequin Spellbinders® M-Bossabilities™ folder; GC-001 Grand Calibur® Machine
- Maya Road - Vintage Flowers - white
- Miscellaneous: liquid glue, Want2Scrap bling - Swirls Finesse - Black Rhinestone 72 Count - Brown Rhinestone - Self Adhesive; Scrapbook Adhesives by 3L E-Z Runner, dimensional foam squares, paper roses, cardstock (cream and green); SRM Stickers
Step 1. Cut circle using Stand Circles Die
Step 2. Adhere Circle mask to white card
Step 3. Sponge lower portion using Bamboo Leaves and a Sponge Dauber
Step 4. Sponge Upper portion using Dandelion and a Sponge Dauber
Step 5.Tear a piece of cardstock and lay across the sponged circle
Step 6. Sponge using Tangelo Ink and a Sponge Dauber - using torn card as a mask.
Step 7. Repeat this step across the yellow portion of the circle, until the desired effect is achieved.
Step 8. Attach Tack'N Peel to the acrylic Block
Step 8. Attach unmounted stamp to Tack 'N Peel
Step 9. Stamp the image across the sponged circle using Onyx Black ink.
Step 10. Cut image to size
Step 11. Adhere to pre-made Easel card
Step 12. Add Swirls Finesse to top left corner
Step 13. Adhere Maya Rd flowers at the top of the flourish
Step 14. Cut long patterned edge from Diamond Effects and adhere to right side of the image.
Step 15. Adhere patterned paper top base of card
Step 16. Add a 2cm strip across the center - popping up on foam tape
Step 17. Adhere SRM Stickers Sentiment onto white card and cut around.
Step 18. Adhere the sentiment to Diamond Effects ta.g using 3D Foam Squares
Step 19. Adhere to middle strip using sided tape.
Step 20. Attach flower using liquid glue, followed by Swirls Finesse at right side of tag.
Step 21. Cut long patterned edge from Diamond Effects and adhere to lower edge of the raised portion of the base.E
Step 22. Add bling along the Diamond Effects edge as shown in the main photo.
Thank you for your
comments and all of the support you give me - you make blogging such an amazing
place to be!! Your encouragement is such a blessing for me - it makes my day!
God bless you!
{{{Hugs}}}


