Pages

Wednesday, February 27, 2019

Recycled Presents Galore

Hello friends, welcome and thanks so much for stopping by!  I have been busily trying to work ahead with everything as I head off to my homeland (New Zealand) to celebrate my Mothers 80th birthday - it is even sweeter as my youngest daughter and the grandson will be coming too - quite a special time.  Thankfully I have worked ahead with tutorials and Design Team work but due to complicating things by literally 'hitting the ground running' which has resulted in a Cortisone injection into the hip and a tear in a tendon, I have not been able to complete 'other' posts - I do apologise in advance - my Tutorial are all done and are scheduled here - I hope you enjoy those.


In the meantime I have been working on some cards in case the Shop that sells them needs them while I am away - they just had 28 sell in two weeks and 36 the month before that - not complaining at all!  I have upcycled this image - so cool for a masculine card.


 The card front  has been embossed using the Spellbinders Em-bossing Fold'ers Grid.  This has been sponged using Imagine Inks, trimmed and popped up onto a slightly larger white card front using double sided tape.


The image has been fussy cut/handcut using scissors and popped up onto the card front using Scrapbook Adhesives BY 3L 3D Foam Squares,  The Penny Black Inc sentiment has been stamped using Imagine Memento Ink in Tuxedo Black, lightly coloured using Markers and popped up below the image. 

White and yellow paint splatters and have randomly added to the card front.


This card is linked to the following challenges:
Lemon Shortbread - Always Anything Goes 
Through The Craft Room Door - Always Anything Goes 
The Paper Nest Dolls Challenge ALWAYS ANYTHING GOES
613 Avenue Create - Anything Goes w/Optional Twist: Critter
Lil Patch of Crafty Friends - Anything Goes
The Corrosive Challenges Always Anything Goes
DL.Art Linky Challenge - Always Anything Goes
A Gem of a Challenge - Anything Goes
Penny Black Saturday Challenge - Anything Goes + optional: Flowers
Dream Valley Challenge - Sparkle and Shine
Crafting From The Heart - Anything Goes
Digi Chooseday Challenge -  Anything Goes
Jo's Scrap Shack - ALWAYS ANYTHING GOES   
Just Add Ink - JUST ADD EMBOSSING
QKR Stampede ALWAYS ANYTHING GOES
Word Art Wednesdays Anything Goes 

Thank you for your comments and all of the support you give me - you make blogging such an 
amazing place to be!! Your encouragement is such a blessing for me - it makes my day! God bless yo

                                                          {{{hugs}}} and happy crafting

Monday, February 25, 2019

Spellbinders Amazing Paper Grace Shadowbox Tutorial

Hello friends - thanks so much for visiting.  Today I am excited to be sharing a card I created using some of the new Shadow Box Collection by Becca Feeken.   For the beginner these dies may look a little confusing at first, hopefully this tutorial will clarify how they work.  This tutorial is photo heavy but it is the easiest way to show you all of the steps.  There is a link to Becca's Video Tutorial at the end of the Tutorial.


'Within each set is 5 dies - 4 make up the adjustable frames and the tiny one is a hinge/corner piece. The 4 adjustable frame pieces come in two designs - they mirror each other so ensure you use matching ones.' - Spellbinders

1. Cut 4 strips of card stock 3" (the width of the dies) x  6".  Using the 3/4 inch set  and cut two of each Shadowbox Dies using white card stock .  
2. Aligning the dies - spot the little corners? Becca refers to these as 'bump outs'. Align that 'bump out' with the corner of your card, Here's the dies positioned and taped to the lengths of card. This will create two sides of the frame so you'll need to do this twice.
3. Run through your die cutting machine, no need to emboss. Remove the dies, repeat until you have four (4) pieces - two of each design.
4. Next, use a score board or if you haven't got one, a ruler and a scoring tool. Notice the die has already imprinted lines top and bottom? You are scoring so those lines join up. All four (4) pieces scored.  You get faster as you do more!


5. Affix a strong tape to each the wide side of each panel
6. Now fold along all those score lines, remove your tape and fix each side down.
7. You will then have 4 frame pieces, two look straight and two mitred. The mitred ones have sticking out tabs. Those tabs tuck inside to give extra reinforcement.
8. Also cut 4 little hinge pieces, again no need to emboss. Now to join all the frame pieces.
9. Alternate mitred with straight pieces.  Fold the little hinges in half, apply glue and slot into the end of each frame piece. Take your time so the line in the hinge aligns with the top of your frame piece. You'll then find you can slot each frame piece in at right angles.
NOTE: make sure you have all the fronts of your frame pieces in a line when assembling, it is so easy to get this wrong! 

10. I have also used an optional method with hinge pieces - as well as the above and adhered to
 on the outside to hold the corners, they not only look fabulous but add extra strength to the Shadowbox.

11. Once all pieces are glued , gently push your frame into the corner of your Scorpal to make sure it is aligned - it is a very sturdy frame - an amazing design. 
12. Attach a back piece of card and that is the first stage completed.


13. Cut one piece of  Kraft card stock to measure 11.5cm x 11.5cm (the same as the centre of the Shadowbox.  
14. Cut/emboss the tree in the centre using both the insert and the outer edge.  Pop up into the frame using 3D Foam Squares.
15. Cut/emboss the Deer in the centre of white card stock measuring 11.5cm x 11.5 cm using both the inset and the outer edge.


16. Lightly sponge the Deer inset using ink and sponge daubers.  Pop up into the frame using 3D Foam Squares.
17. Cut/emboss the Sentiment layer in the centre of cream card stock measurng 11.5cm x 11.5 cm also using 3D Foam Squares.

18. Cut/emboss two complete sets of Cinch and Go IV  flowers, sponge the centre of each die cut using Rhubarb Stalk Ink and a sponge dauber.
19. Shape the petals using a foam mat and stylus, layer the smallest three into a flower, using glue - offsetting the leaves .  Repeat using the larger three die cuts.
20. Cut/emboss three sets of leaves using green card stock.  Shape using a foam mat and stylus.  
21.Adhere three leaves to both flowers using glue.

22. Cut/emboss one Vintage Starburst Valance and Gatefold Etched Dies using cream card stock, trim the top of the die cut so the bottom of the curve sits above the inserts.
23. Cut the Vintage Starburst Valance and Gatefold Etched Die down the centre, glue each half to the top of the frame as shown in the main photo.

24. Glue a strip of vintage lace across the bottom of the frame, trim any excess off each side.
25. Glue seven (7) small yellow pearls to the centre of each flower, next glue one large flower to each corner and a small flower beside it.
26. Cut/emboss one Shadow Box Ribbon Threader using cream card stock and the Ladder Outer - straight outer and the scalloped inner dies. Trim to size.
27. Thread the seam binding through the Ribbon Threader and secure at the back with double sided tape.
28. Glue to the top of the Shadow Box, 

Becca's Video Tutorial can be found HERE

Spellbinders Products


  • Other: Cream, Kraft and white card stock; Kaisercraft: Golden Grove Collection 6x6; Want2Scrap: Baby bling - Yellow Pearls;  Scrapbook Adhesives by 3L: E-Z Adhesive Runner, 3D Foam Squares; liquid glue; Imagine Memento Inks in Bamboo Leaves, Dessert Sand and Rhubarb Stalk, Sponge Daubers
Thank you for your comments and all of the support you give me - you make blogging such an amazing place to be!! Your encouragement is such a blessing for me - it makes my day! God bless you!

                                                          {{{hugs}}} and happy crafting

Sunday, February 24, 2019

Spellbinders Romantic Roses

Hello friends, welcome and thanks so much for stopping by.  Just when I thought I had finished with the cards created using stickers - I came across another one - now I am pretty sure, ALMOST DEFINITE, this IS THE LAST ONE!!  There are eight in total and I can't believe I am saying this - I really enjoyed using them and won't hesitate to use stickers again - depending on what they are of course!!  I have also use pre-cut and recycled Spellbinders Dies from Workshop Kits and pieces of bling that are left sitting on my desk.  I have really enjoyed the challenge of using them to create pretty and quick cards .


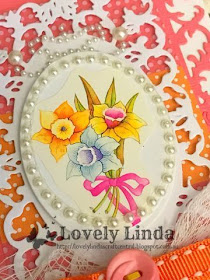
 Pink card stock has been cut/embossed using the Spellbinders Nestabilities Romantic Rose Etched Dies using pink card stock and the Platinum Die Cutting Machine  to form the card front.  A strip of pink spotted patterned paper had been adhered across the centre of the card front, along with a smaller orange spotted border across the centre of the card front and adhered up onto a slightly larger pre-cut white card base using Scrapbook Adhesives BY 3L E-Z Adhesive Runner Ultra. 


The sticker is also from my stash and has been adhered to a small die-cut oval, it has been popped up using Scrapbook Adhesives BY 3L 3D Foam Squares, onto the smallest frame from the Spellbinders Nestabilities Romantic Rose Etched Dies using white card stock and the Platinum Die Cutting Machine Want2Scrap Nestabling has been trimmed and adhered at the top of the die cut. oval.   A strip of lace has been glued to the base of the floral sticker and a double orange bow has been glued to the centre and a threaded button glued to the knot of the bow,


This card is linked to the following challenges:
A Gem of a Challenge - Anything Goes 
Allsorts - Spring Flowers
Crafty Friends Challenge - Gemstones/Pearls 
My Time to Craft  - Pink & Girly
Alphabet Challenge -  X IS FOR XTRA BLING
Simon Says Wednesday - No Stamps
Craft Rocket Challenges - Valentine 
Crafting With An Attitude - Always Anything Goes
DL ART Thankful Thursday Challenge - Feb- Pink and/or Red
Moving along with the Times - A Little Bit Shabby Chic
Crafting By Designs - Inspired by a Movie (Pretty in Pink)
Creative Moments - Anything Goes
Scrapy Land Challenges - Always Anything Goes with Die Brand SL sells
Word Art Wednesdays Anything Goes 
Lemon Shortbread  - Always Anything Goes
Get Creative Challenges ANYTHING GOES OPTION USE LOTS OF RED
Scrapbook Stamp Society Challenge Blog - ANYTHING GOES  OPTION BIRTHDAY 

Thank you for your comments and all of the support you give me - you make blogging such an amazing place to be!! Your encouragement is such a blessing for me - it makes my day! God bless you!

                                                          {{{hugs}}} and happy crafting

Thursday, February 21, 2019

Simply Just for You

Hello friends, welcome and thanks so much for stopping by.  Today I have a simple and elegant card to share with you created using ta sentiment from Quick Quotes Scrapbook Company as the focal point.


This has been layered into patterned paper created using two different Kaisercraft patterned papers that have been cut/embossed using the largest die from the Spellbinders A2 Curved Matting Basics A Card Creator Etched Dies and the Platinum Die Cutting Machine and adhered to a slightly larger pre-cut white card base. 


A thin strip of patterned paper has been adhered either side of the sentiment using Scrapbook Adhesives BY 3L E-Z Adhesive Runner Ultra . A black double seam binding bow has been glued to the left side of the sentiment and a mulberry paper rose glued to the knot.


Want2Scap Beautiful Bling Borders has been trimmed and added above the sentiment panel and 20 Count Red Pearls have been adhered along the Beautiful Bling Border and below the sentiment panel.


This card is linked to the following challenges>
Lemon Shortbread - Always Anything Goes
Crafty Friends Challenge - Anything Goes
Get Creative Challenges - ANYTHING GOES OPTION USE LOTS OF RED
Scrapbook Stamp Society Challenge Blog ANYTHING GOES  OPTION BIRTHDAY 
Polka Doodles Challenge - Anything Goes
Jo's Stamp Shack - Anything Goes
Craft-Dee BowZ - Anything Goes with a Handmade Bow.
Crafty Catz Challenge - Anything Goes - Optional - Keep it Simple
Pearly Sparkles Challenge It's a Love thing
Crafting With Friends - Anything Goes
The Creative Crafters Anything Goes
Colour Crazy Challenge - Anything Goes
World Wide Open Design Team Challenge - Always Anything Goes 
The Alphabet Challenge - x is for xtra bling
QKR Stampede - ALWAYS ANYTHING GOES

Thank you for your comments and all of the support you give me - you make blogging such an amazing place to be!! Your encouragement is such a blessing for me - it makes my day! God bless you!

{{{hugs}}} and happy creating


Wednesday, February 20, 2019

Spellbinders 'A Better Late Than Never' - Tutorial

Hello friends, welcome and thanks for stopping by.  I am sharing a tutorial I did for Spellbinders some time ago - a number of years infact, but with changes to the Blog and all that happens it 'fell between the cracks' and although some of the dies are no longer available I thought it was worth sharing for the inspiration alone - you may even have these dies - if not, you will have something that will work just as well.  It certainly shows how timeless Spellbinders Dies are.


 I do love to layer the different Dies and "mixing it up." But I also love how effective it is to create beautiful details using one of the basic Labels and the Decorative Elements set that coordinates with it. Let me show you how!

Instructions:


1. Cut two (2) Labels Forty Nine Die #6 and one (1) Die #4 (the smallest sized die is #1) using white card stock and the Platinum Die Cutting Machine.
2. Score one of the Labels Forty Nine Die Cut #6 (#1 being the smallest) at ½" and fold forward.
3. Place adhesive in the scored area with double sided tape and with the other Labels Forty Nine Die Cut #6, align together to create one shape. Press the adhered area to secure.


4. Cut/emboss one (1) each of Labels 49 Decorative Elements Die #3 and #2 (#1 being the smallest) in Captivating Coral.
5. Adhere the smaller Dies to the larger ones using 3D Foam Squares
6. Thread the ribbon through the holes and behind the Chipboard Tag, securing at the back with double sided tape.
7. Attach to the centre of the layered card base using double sided tape.


8. Cut/emboss one (1) Bitty Blossoms Flower Med Die using white card stock.
9. Sponge the outer edges using Petal Pink Ink and a sponge dauber.
10 Use the Stylus to shape the petals, roll Bitty Blossom die cut and secure at the base using liquid glue.


11 Cut two (2) each of the Create a Rose Leaf SM and Leaf LG with green card stock.
 NOTE: Stencil through the die by sponging with Bamboo Leaves Ink before removing card stock from the die.
12 Adhere the leaves under the rose using liquid glue.
13 Add White Pearls to each corner of the layered card.


Spellbinders Products:

Other:
Graphic 45: Chipboard Tags; Imagine: Memento Ink in Bamboo Leaves and VersaMagic Ink in Petal Pink; May Arts Ribbon: White Ribbon; Scrapbook Adhesives by 3L®: E-Z Runner Permanent Strips and 3D Foam Squares; Want2Scrap©: 72 Count - White Pearls - Self Adhesive

Thank you for your comments and all of the support you give me - you make blogging such an amazing place to be!! Your encouragement is such a blessing for me - it makes my day! God bless you!

{{{hugs}}} and happy creating