Hello Spellbinders fans, I am sharing a Step by Step Tutorial on the Spellbinders Blog using some of my favourite Dies - it makes it so-o-o easy. I have been a little time challenged lately with some BIG Spellbinders Workshops happening and others to prepare for - not to mention our darling new grandson - who at 11 weeks is nothing but adorable and my biggest distraction! LOL!
Needless to say my creative time has been a little less but I can't resist my Spellbinders Dies for too long - and today I am sharing a pretty card that is so simple to create and still very elegant - you have to love that don't you - lets face it - we all have 'real life' moments that take us away from our Studios/Craft Rooms....
- ES-016 Cabbage Roses
- S4-475 Fleur de Elegance
- S4-490 Triple Tear
- SCP-003 Captivating Coral
- SCP-008 Pixie Play
- SCP-013 Whirl White
- GC-200 Grand Calibur Die Cutting and Embossing Machine
Cross Promotional Partners:
- Imagine Crafts 'featuring' Tsukineko: Memento Ink in Teal Zeal, Bamboo Leaves Sponge Daubers
- Anna Griffin: Grace Collection Diecut Embellishments
- Want2Scrap©: 72 Count - Pink Pearls - self Adhesive, Mulberry paper Rose
- Scrapbook Adhesives by 3L: E-Z Adhesive Runner; Crafty Foam Tape; 3D Foam Squares
Other: Seam Binding; paper flowers
1. Cut/emboss one (1) Fleur de Elegance #3 (#1 being the smallest) in Whirl White cardstock
2. Cut/emboss one (1) Triple Tear #3 #4 (#1 being the smallest) using Pixie Play cardstock. Placing #3 inside #4 to create a frame.
NOTE: It is advised to use repositional tape to hold the dies securely
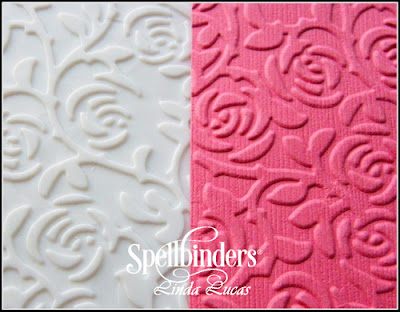
3. Emboss Captivating Coral cardstock using Cabbage Roses M-Bossabilities™ folder
4. Trim to size (4¼ x 5½”) and adhere to slightly larger white card base using Crafty Foam Tape
5. Adhere Fleur de Elegance using Crafty Foam Tape
6. Adhere Triple Tear using Crafty Foam Tape
5. Attach the Diecut Embellishments using 3D Foam Squares, popping leaves over the frame
6. Add Seam Binding around the front of the card adhering in the center using liquid glue
7. Adhere double seam binding bow over the join
8. Attach flowers using liquid glue
9. Adhere pink pearls as shown in the main photo
Designer Hint: Cut more than one Die each time you create and put the extra ones aside for those times you need to create something quickly - you won't regret it!
I told you it was easy didn't I!! I hope you are inspired to create your own cards - even when you are time challenged - it does not have to take long with Spellbinders Dies - as you can see
Thank you for your comments and all of the support you give me - you make blogging such an amazing place to be!! Your encouragement is such a blessing for me - it makes my day! God bless you!
{{{Hugs}}} and happy crafting!!


Not only easy but adorable too Linda.
ReplyDeleteBlessings
Maxine
A beautiful card Linda. I really love the roses.
ReplyDeleteAbsolutely a beautiful card and thanks so much for the tutorial.
ReplyDeleteBeautiful colors and style Linda, i love it
ReplyDeleteElaine H X
Thank you Linda. I am going to try it with a pram, booties or something like that, instead of the flowers as a baby card.
ReplyDeleteDoreen H