}
Showing posts with label Handmade paper. Show all posts

Sunday, October 7, 2018

Friends and Handmade Paper

Hello friends - thanks so much for dropping in.  It is Sunday evening here in the Nations Capital and we are now officially on Daylight Savings - I do love the extra hour of daylight in the evenings, although I know others don't! 


I have a very CAS (Clean and Simple) card to share with you today, using a stamped sentiment I was sent some time ago by my dear friend Maxine.  I have used handmade paper to compliment it - I love the texture the handmade paper adds. The two papers have been adhered down the centre using  Scrapbook Adhesives by 3L: E-Z Adhesive Runner Ultra.


A 'Stamp' has been cut from Graphic 45 paper and glued to the top right of the card front.  I have added some random postmarks using a stamp from my stash and Imagine Memento Ink in Tuxedo Black, making sure one of the is across the 'faux stamp'.


Along with strips from two different Washi Tapes - it is amazing how much difference they make - sometimes it is the 'little things!'  The card front has been cut/embossed using the second largest die from the Spellbinders 5 x 7 Matting Basics A Card Creator Etched Dies and the Platinum Die Cutting Machine and popped up onto a slightly larger pre-cut orange card base using Scrapbook Adhesives by 3L.


This card is linked to the following challenges:
Catch The Bug Anything Goes
Challenge Up Your Life Washi Tape 
Crafty Calendar Autumn
Crazy 4 Challenges - Any Card
Crafting-With-Friends ANYTHING GOES 
Creative Fingers - ANYTHING GOES 
QKR Stampede - ANYTHING GOES
4 Crafty Chicks Something Old Is Something New (old - sentiment, new - handmade paper)
Craft Rocket Challenges - Oct- Autumn/Halloween
Crafting With An Attitude - Always Anything Goes
Moving along with the Times - Autumn/Fall
Crafting By Designs - October Anything Goes
Crafty Creations - Always Anything Goes 
Crafty Gals Corner Fall
WordArt Wednesdays Anything Goes
A Perfect Time To Craft - Always Anything Goes
Crafty Hazelnut's Patterned Paper Anything Goes with Patterned Paper
Creatalicious Challenges - Anything Goes + Option: Texture
Happy Craft Challenge - Anything Goes

Take care friends - thank you for your comments and all of the support you give me - you make blogging such an amazing place to be!! Your encouragement is such a blessing for me - it makes my day! God bless you!

{{{Hugs}}} and happy crafting
                              

Tuesday, May 23, 2017

Spellbinders Earth Laughs in Flowers Tutorial

Hello friends, it is always exciting to be sharing a tutorial for Spellbinders...today I am sharing a card using a lot of my favourite Spellbinders Products - Dies being a lot of them - LOL!  I do have to admit - I am finding the Stamp and Die sets addictive as well - but I am not complaining! 


Spellbinders Supplies:

Other : Liquid Glue; Scrapbook Adhesives by 3L: E-Z Adhesive Runner, 3D Foam Squares; Imagine: Memento ink in Tuxedo Black, Delicata ink in Golden Glitz; Want2Scrap: 72 Count -  Sage Green Pearls - Self Adhesive, Beautiful Bling Borders by Nina Brackett; Patterned paper; Chameleon Pens; Sanding Block


1. Cut/emboss one Classic Label 33 Decorative Elements #2 (#1 being the smallest) using white card stock.
2. Using the Die as a stencil, sponge the inside edges of the Die using Golden Glitz ink and a Sponge Dauber.
3. Stamp the Vintage Elegance Becca Feeken Beautiful Dreamer Stamp sentiment using Tuxedo Black ink.
4. Cut/emboss using Art Nouveau Style Nouille Decorative Element  Die.
5. Using the Die as a stencil, sponge the inside edges of the Die using Golden Glitz ink and a Sponge Dauber.

6. Cut/emboss patterned paper using  Hemstitch Rectangles Etched Dies Venise Lace by Becca Feeken.
7. Sand the edges using a Sanding Block,

8. Stamp the large image from the Earth Laughs Stamp and Die Set using black ink,
9. Cut/emboss the image using the co-ordinating Die.
10. Colour the image using Chameleon Pens,
11. Adhere the flower image onto the Classic Label 33 Decorative Elements using 3D Foam Squares.
12. Adhere the layered image onto the Hemstitch Rectangles using 3D Foam Squares.

13. Adhere the layered Dies onto a pre cut card base using E-Z Adhesive Runner,
14. Pop up the Die cut sentiment above the flowers, with the frame tucked in behind the flowers slightly,
15. Trim the Beautiful Bling Borders to size.
16. Adhere to each corner, along with green pearls added as shown above.

Thank you for your comments and all of the support you give me - you make blogging such an amazing place to be!! Your encouragement is such a blessing for me - it makes my day! God bless you!

{{{hugs}}} and happy crafting

Sunday, May 21, 2017

Beautifully Framed Silhouette

Hello friends,  it is Sunday night here and the weekend is fast disappearing, I hope you have had a good one - or are still enjoying one,  I have found time in The Studio - which is always a good thing - for me anyway,


My card today has been created using a retired Silhouette image that has been stamped using Imagine Memento Ink in Bamboo Leaves and layered onto yellow card stock.  The layers have been popped up onto patterned paper that has been embossed using Spellbinders Em-bossing Fold'ers Grid 4.25 x 5.5 in Single Sided and popped up onto a pre-cut card base using Scrapbook Adhesives by 3L.


The ornate frame at the top has been cut/embossed using Spellbinders Nestabilities Art Nouveau Water Lilies Decorative Accent Stacey Caron Etched Dies and popped around the layered image.  The flower is from the Shapeabilities Heart & Home Flower Play Etched Dies and the leaves from the Shapeabilities Amazing Paper Grace Stack and Fan Flowers Etched Dies. The flower and leaves have been adhered to the lower portion of the layered image and lave added across the lower portion of the card,  I have finished off using adding Want2Scrap Swirls Finesse - LeCreme either side of the flowers.


This card is linked to the following challenges:
Crafty Catz - Anything Goes with a twist: More Than 2 Layers
Pattie's Creations - For The Girls
Aud Sentiments Challenge - Anything Goes +A Sentiment
Crafty Gals Corner - Add Flowers
Crafty Friends Challenge - Summer Colours
A Gem of a Challenge - Spring Fever
Crafty Catz Challenge - Anything Goes, with a twist of two of more layers

Take care friends - thank you for your comments and all of the support you give me - you make blogging such an amazing place to be!! Your encouragement is such a blessing for me - it makes my day! God bless you!

{{{Hugs}}} and happy crafting

Monday, May 15, 2017

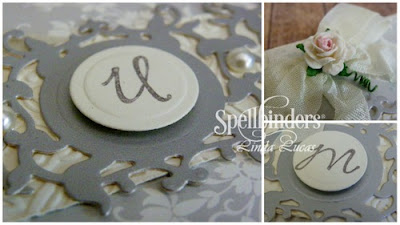
Spellbinders Royale Monogram - for Mum Tutorial

It is always exciting to be sharing a Step by Step tutorial for Spellbinders - I am featuring a beautiful card especially for Mum/Mom using the Royale Monogram Set Stamp and Die Set from the Rouge Royale Deux Collection by Stacey Caron. These Dies really make creating elegant cards so effortless - as you will see in my Step by Step instructions.


Spellbinders Products:
    Other : Liquid Glue; Scrapbook Adhesives by 3L: E-Z Adhesive Runner, 3D Foam Squares; Imagine: Memento ink in Espresso Truffle, Anna Griffin Inc. Lovely Layers 5"x7" paper; Seam Binding; Mulberry Paper Rose; Want2Scrap: 72 Count - White Pearls - Self Adhesive.

1. Stamp the letters onto white card stock using Espresso Truffle ink.
2. Cut/Emboss each letter using the small circle Die.
3. Cut/emboss three frames using silver card stock.

4. Cut/emboss the patterned paper using the frame only from the Renaissance Jubilee Roman Trellis.
5. Lightly sand the raised edges using a sanding block.

6.  Emboss a 5cm wide strip of cream card stock using The Floral Embossing Folder.
7. Adhere across the centre of the Die cut card front using E-Z Adhesive Runner,
8  Turn the card front over and trim off any excess cream card.
9. Pop the card front up onto a pre-cut card base using Scrapbook Adhesives by 3L 3D Foam Squares.


10. Adhere the frames across the embossed panel, slightly overlaping the filigree, using liquid glue.
11. Pop up the sentiment circles using Scrapbook Adhesives by 3L 3D Foam Squares.
12, Glue a double seam binding bow to the top left corner, with a Mulberry Paper Rose in the centre.
13. Finish by adding white pearls to the front of the card as shown in the main photo.

It really is as easy as that - I hope you are inspired to get your Dies out and create!!  

Thank you for your comments and all of the support you give me - you make blogging such an amazing place to be!! Your encouragement is such a blessing for me - it makes my day! God bless you!
{{{hugs}}} and happy crafting

Monday, May 8, 2017

Spellbinders Rocket Card Tutorial

Hello friends, I am sharing a tutorial for Spellbinders today - this one is special to me as it is the card I created for my grandson, Noah's 2nd birthday.  What little boy doesn't love a Rocket and all that goes with it - such a fun project and so easy to create a very cool scene.


Spellbinders Products
    Other : Liquid Glue; Scrapbook Adhesives by 3L: E-Z Adhesive Runner, 3D Foam Squares; Imagine: Radiant Neon Inks, Memento ink in Teal Zeal; Handmade paper; Gold and blue card stock, small amounts of yellow card stock and recycled cardboard, computer generated sentiment

1. Cut/emboss the Large Circle and ring using Gold Card stock,
2. Cut/emboss the Star, Shooting Star and Flame using yellow card stock.
3. Use the Die as a Stencil and sponge inside the edges of the Star, Shooting Star and Flame using Radiant Neon inks

4. Lightly sand the Large Circle and ring using a Sanding Block.

5. Cut/emboss the Rocket using recycled cardboard(eg. cereal box).
6. Use the Die as a Stencil and sponge inside the edges of the Rocket using Teal Zeal Ink.


7. Emboss handmade paper using Seth Apter Em-bossing Fold'ers Lazer Beams.
8. Randomly sponge using Radiant Neon Inks and a Sponge Dauber.
9. Glue the Die cuts onto the handmade paper, creating a scene.
10. Adhere the sentiment using double sided tape.
11. Layer onto a pre-cut blue card base using 3D Foam Squares,


Take care friends - thank you for your comments and all of the support you give me - you make blogging such an amazing place to be!! Your encouragement is such a blessing for me - it makes my day! God bless you!
{{{Hugs}}} and happy crafting