}
Showing posts with label Vintage Lace. Show all posts

Sunday, February 16, 2020

Love Always Wins...

Hello friends, welcome and thanks so much for stopping by.  I hope you are enjoying your weekend at some level.  It is Sunday night here in the Southern Hemisphere and I have spent a good part of the afternoon and evening creating in front of the 'Fire Fight Australia' Bushfire Relief Concert - it is amazing and so touching to see so many amazing muscians come together to fundraise after the bushfires.


Something I have had sitting on my desk for some time is this beautiful figurine that my DH gave me when things were changing for me creatively - it made him think of Frida Kahlo and the sentiment is perfect. When he gave it to me he said, 'this is to inspire you as you enter a new season' - he said I was transitioning, which I don't mind as long as it doesn't involve hormones LOL!  I have to be totally honest and admit that she sat on my desk for 6 months - I didn't want to ruin her...so I waited....


I started by adding recycled sari silk as a headband,making sure it was wrapped around her bun - and that was all I needed to get started - funny what inspired us isn't it!?  To this I added a mixure of flowers and leaves - after all Frida is known for her beautiful floral crowns. I have used a mixture of Little Birdie Crafts flowers and some from my stash.  A silver chain and heart was added around her neck and secure using glue.

I do have to say at this stage the thin eyebrows were a little bit challenging - espcially when Frida is known for her 'monobrow' so I slowly thickened them with a fine pen and brushstrokes - they need to be thicker but I will do that at some stage...


Embellishments from my stash were added around the waist, starting with a thing strip of tulle at the waist, a gold jewellery piece - a grape cluster and a teal bird.  Above the lace around the hem I added an old bracelet, small flowers and small shells that were glued onto the bracelet.  The shells were from my beautiful Nana - I have had them for some time and loved the touch they add.  I have used Scrapbook Adhesives BY 3L to adhere all of the embellishments I have added.

I added depth to the flowers using Chameleon Alcohol Markers, along with a little Crackle Paste to give it a more aged appearance - just a light touch, but loving the effect it added.  I finished off by filling in the indents/dots around the metal wings with a white paint pen - all in all I am very happy with the wayshe looks, but you can be sure I will continue to add bits and pieces along the way until I feel she is complete - if there is such a thing LOL!


This project is linked to the following challenges:
A Bit More Time to Craft - Always Anything Goes
A Perfect Time To Craft - Always Anything Goes
Bleeding Art Challenge Always Anything Goes
Classic Design  Challenge - Always Anything Goes 
DL.Art Linky Challenge - Always Anything Goes
Not Just Cards - Always Anything Goes
World Wide Open Design Team Challenge - Always Anything Goes
Fab n Funky - Love
The Three Muses - Flowers 
Word Art Wednesdays - Anything Goes
Everybody-Art-Challenge - Color of Love
Dare 2B Artzy Challenges - Love is in the Air
We Love 2 Create  - Always Anything Creative/Mixed Media Goes

Thank you for your comments and all of the support you give me - you make blogging such an amazing place to be!! Your encouragement is such a blessing for me - it makes my day! God bless you!
                                                          {{{hugs}}} and happy creating


Friday, January 17, 2020

Pen and Ink Mini Album

Hello friends - welcome and thanks so much for stopping by.  Once again I am trying to make the most of  a quiet moment or two and play a little catch up with posts and projects.  Today I am sharing a Mini Album I created for a dear friends birthday.


I have used an older Kaisercraft Collection Pen and Ink for the album, love the crispness of the black and white - it is always so easy to mix and match with a Collection, it certainly takes the guesswork out of it!  I have used Scrapbook Adhesives by 3L E-Z Adhesive Runner to adhere the papers to the album pages.


I love this gorgeous little girl image and have never been too sure how to use it - but she fits perfectly into the frame with her body popped up using Scrapbook Adhesives by 3L 3D Foam Squares.The sentiments are from a mix of Kaisercraft Collections 


The beautiful flowers are from Little Birdie Crafts - I love the variety and dimension without being too bulky!  Some of  the sentiments have been adhered to Spellbinders Dies and tucked into pockets.  Wooden embellishments, lace and other miscellaneous elements have been added.  


This project is linked to the following challenges:
Crafty Creations - Always Anything Goes 
Creative Moments - Anything Goes 
Ellibelle's Crafty Wednesday - New Goodies/Old favorites or Both
Scrapy Land Challenges - Always Anything Goes with Die Brand SL sells (Spellbinders)
Sisterhood of Crafters - Thinking of You
The Paper Funday - Anything Goes/Optional Twist Friendship
Word Art Wednesdays - Anything Goes
Crafty Sentiment Designs - Anything Goes
Lemon Shortbread - Always Anything Goes
Through The Craft Room Door - Always Anything Goes
 Tuesday Throwdown - Something New (flowers)
Get Creative Challenges - SOMETHING NEW (flowers)
Use Your Stuff - ANYTHING GOES
613 Avenue Create - Anything Goes w/Optional Twist: Shiny
Dragonfly Dreams - Anything Goes
International Art & Soul - Monochromatic 
The Corrosive Challenges Always Anything Goes
We Love 2 Create  - Always Anything Creative/Mixed Media Goes
Incy Wincy Designs - Anything Goes

Thank you for your comments and all of the support you give me - you make blogging such an amazing place to be!! Your encouragement is such a blessing for me - it makes my day! God bless you!
                                                          {{{hugs}}} and happy creating

Thursday, January 9, 2020

Baby Album

Hello friends - welcome and thanks so much for stopping by.  I am trying to make the most of  a quiet moment and play a little catch up with posts and projects.  Today I am sharing a Baby Album I created for my niece who is expecting a beautiful baby girl in March - I have t be honest and say I really tried to tone it back a little - girl albums are so easy to go crazy on - I think I reached a good compromise -needless to say my niece loved it and I look forward to seeing photos in it once my great-niece arrives.


I have used older Authentique Paper patterned papers for the album, love the soft pastels - it is so easy to mix and match with a Collection, it certainly takes the guesswork out of it!  I have used Scrapbook Adhesives by 3L E-Z Adhesive Runner to adhere the papers to the album pages.


The sentiments are from a Kaisercraft Collection - obviously a baby girl collection, along with the Authentique Papers sentiments. 


The beautiful flowers are from Little Birdie Crafts - I love the variety and dimension without being too bulky!  Some of  the sentiments have been adhered to Spellbinders Dies and tucked into pockets.


Wooden butterflies and miscellaneous embellishments have been added.  Every embellishment that is overlapping onto white card stock for photos has been left with that portion free of adhesive to allow the photo to be popped in.


This project is linked to the following challenges:
Word Art Wednesday - Anything Goes
Ellibelle's Crafty Wednesday - New Goodies/Old favorites or Both
Crafty Sentiments Challenge - Anything Goes
Paper Shelter - New Beginnings
Arty Divas Challenge - Anything Goes
The Three Muses - Pink
Paper Fun Days - Anything Goes - Optional Friendship
Lemon Shortbread - Always Anything Goes
Simon Says Wednesday - Fun with Florals
Through The Craft Room Door - Always Anything Goes 
Creative Moments - Anything Goes
Always Fun Challenges - SOMETHING NEW
Crafty Creations - Anything Goes
Get Creative Challenges - SOMETHING NEW
613 Avenue Create Anything Goes w/Optional Twist: Shiny

Thank you for your comments and all of the support you give me - you make blogging such an amazing place to be!! Your encouragement is such a blessing for me - it makes my day! God bless you!
                                                          {{{hugs}}} and happy creating

Thursday, November 29, 2018

Paper Bag Album - Destination Phoenix USA

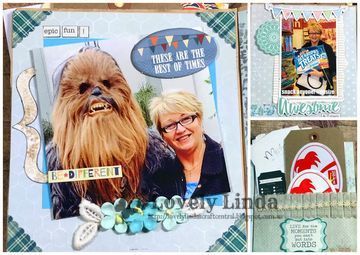
Hello friends,  thanks so much for stopping by.  A little warning that this is a lengthy Post - I am sharing a whole album here, rather than over two posts! I don't know about you but I always seem to be working on so many things at once and it is always such a great feeling when you manage to complete one - especially when it is something I have wanted to do for a few years.  A Paper Bag Album of my trips to Phoenix for Spellbinders as one of their Designers/International Ambassadors.  I have been very blessed and feel it is important to have these memories recorded - it has been so much a part of what I do and who I am creatively - and I am so grateful - I hope you enjoy reminiscing with me.


I used soft colours for the Album - I believe they were Melissa Frances along with bits and pieces from my stash,these have been attached using Scrapbook Adhesives by 3L E-Z Adhesive Runner Ultra, to make use they don't lift.  I have also used the Spellbinders Shapeabilities Victorian Medallion One Etched Dies as the centre piece and added some metal embellishments around it - I love the look that has been achieved. 


The flower is from the Spellbinders Shapeabilities Laced Flowers Etched Dies Special Moments Collection by Marisa Job and has been sponged using Imagine Memento Ink in Teal Zeal and glued to the centre of the die cut. The sentiment has been trimmed from one of the photos and layered into slightly larger teal card stock and then glued to either side of the flower.

As you can see from the photos above , layers and embellishments, along with tags in the top pockets certainly add to the 'bulk' of the Paper Bag Album - and I love that - so many beautiful things hidden within!


I have die cut photos and lightly sanded the edges - a favourite technique with the Spellbinders Dies. I have tried to keep the photos in chronological order.  I have also added pockets on three of the pages and placed more photos, tickets etc from my trip that I hope to add to tags, but if I don't, they are still part of the album and add to the general look (and bulk).


I have used chipboard embellishments from varying companies, including Quick Quotes Scrapbooking Company, Cosmo Cricket and Kaisercraft...some of thee have been in my stash for longer than I like to say wink:wink!  I have also added flowers from Little Birdie Crafts, some cut from patterned lace and hand made embellishments.  The lace is from a bag of vintage lace I purchased - the bag ended up being three bags with some gorgeous vintage lace among it - one happy designer here!!

The above photos were taken in Los Angeles - we had a 14 hours layover and one of the local designers, Teresa Horner took us on a guided tour around the amazing sites of LA - including homes of the rich and famous - yes we got to see the back of their houses and their rubbish bins LOL!  We did many of the tourist sites, including the Hollywood Walk of Fame and Pizza on Venice Beach.  We even got to walk the red carpet and were offered to be 'sneaked in' to watch the Premier of the 'Hungerford Games 3' as exciting as that would have been - we had to get back to the airport to catch our flight to Phoenix.


Again I have used Spellbinders Dies to cut the photos and added embellishments from Little Birdie Crafts - how perfect are those Cacti.  The above photos are taken with Designers Judy Hayes, Christine Emberson (my roomie), Karen East Haas and Christy Farneth-kerr.  Karen was the receptionist and Customer Service at Spellbinders and it was a pleasure to meet her - as we all know it is not always the obvious people who keep the company running - and I will say no more on that! LOL!  Christy and her family had re-located to Phoenix to support Stacey and her business - I just might happened to mention - I got lost in the desert with Christy - one main road across the whole thing and we made a wring turn - we may or may not have been talking and not concentrating!  Ursula from Germany was in the back and asked 'do you think we will be back in time for breakfast tomorrow' LOL!  It was hilarious!


The next photos are embellished using vintage lace, Little Birdie Crafts Flowers, Kaisercraft Collectibles and sticker sentiments. I have also used stamps and patterned paper.  The first photo is of Cindy Farneth Alexander - who quickly and affectionately became known as 'Mrs Fix-It' to me.  After chasing lost luggage for three days- all it took was one phone call from Cindy to have it turn up right to my hotel room at 4m in the morning....and then there is Yana Smakula- it was wonderful to meet Yana and get to spend some time with her - I love this photo - captures this talented and somewhat sassy Ukrainian Designer perfectly.  Another pocket holds my Star Bucks memorabilia - John Creighton Peterson would have a Star Bucks coffee waiting for me in the dining room in the morning - love that man!!


Then there was the trip to Sedona - a beautiful surprise from Stacey for her 'girls' and it was amazing - from the minute we left the hotel til we got back - we were treated to beauty of every sort.  Sedona itself is amazing - we all loved the fountain area and the Mexican tiles - everyone got photos - these ones are of Tina McDonald and myself - what a gorgeous lady she is - and so funny.  We were treated to lunch at the very bottom of Sedona - the view was amazing - how could it be anything but!!  I am proud to say I had 'grits and scampi' for lunch - had to have something I don't get at home - loved the grits...it is hard to pick the best moment of the day between the people, the food, the place....a tough job but someone has to do it! LOL!

The final pages have a number of hidden pockets - the first being under the photo, which I popped up on three sides using Foam Tape, leaving the left as the pocket opening - the perfect place to hold more photos - as you can see in the top right hand photo.  The last pocket holds more photos - one of my favourite moments - when Stacey taught a Workshop with the Designers - it was the most inspiring moment for me - so much inspiration and passion - it is life changing.

I am so grateful for the opportunities I have been given and and even happier that I have finally managed to get them documented.  I am sure I will add more bits and pieces to this album but the majority of it is completed - I hope you enjoyed the process.  Now to start on the Australian Mixed Media Roadshow Album.....


This project has been linked to the following challenges:
House That Stamps Built - Anything Goes
Crafty Sentiment Designs  -  Anything Goes
Little Red Wagon - Use Craft Leftovers
Die Cuttin' Divas - must include a Die-cut - Tags
Simon Says Wednesday - Anything Goes
Lemon Shortbread  - Always Anything Goes 
Sisterhood of Crafters 2nd/4th Wed, 3E - Use Stitched Dies  (on photos)
Unicorn Challenge - Use a Sentiment
The Crafty Addicts Anything Goes/Optional Girly
Artistic Inspirations - ANYTHING GOES
Word Art Wednesdays Anything Goes
Get Creative Challenges ANYTHING BUT A CARD
Always Fun Challenges - ANYTHING GOES
The Corrosive Challenges - Always Anything Goes
Allsorts - Inspired by a Song (Leaving on a Jet Plane)
A Vintage Journey PAPER STASH

Thank you for your comments and all of the support you give me - you make blogging such an amazing place to be!! Your encouragement is such a blessing for me - it makes my day! God bless you!
    {{{hugs}}} and happy crafting

Monday, November 26, 2018

Butterflies Lace and Pearls

Hello friends, thanks so much for stopping by!  Happy Monday to you all, although many people dread Mondays it doesn't have to be all bad.  I hope yours is good to you!  I have a card to share with you today that has been created using a die cuts that have been laying on my desk - one of many!


I have cut /embossed a pre-cut inlaid piece of Kraft card stock using the second largest die from the A2 Curved Matting Basics B Card Creator Etched Dies and the Platinum Die Cutting Machine to create the card front.  The card front has been adhered to a slightly larger pre-cut pink card base using Scrapbook Adhesives BY 3L E-Z Adhesive Runner Ultra and added a strip of vintage lace across the lower portion. 

A butterfly from a set of Kaisercraft Collectibles has been glued to the lace and the wings popped up using Scrapbook Adhesives BY 3L 3D Foam Squares.  A mulberry paper rose has been glued to the centre of the butterfly.  The larger two Want2Scrap Pink Rhinestone Nestabling has been adhered to the outer edges of the inlaid pattern and an extra large pearl glued to the centre.

This card is linked to the following challenges:
The Corrosive Challenges -  Always Anything Goes
Creative Fingers - ALWAYS ANYTHING GOES 

A Gem of a Challenge - Anything Goes
Cardz 4 Galz - Flutterby
Allsorts Challenge - Inspired by a Song (Ellusive Butterfly)
C.R.A.F.T. - Make Your Own Embellishment
Sweet Stampin' Challenge - Whatever the Weather
2 Crafty Critter Crazies - Anything Goes with a Critter
QKR Stampede Challenge - Anything Goes
Crafty Animals Always Anything Goes
Jo's Stamp Shack Fun Day  - Anything Goes
Die Cut Divas Anything Goes
Digistamps 4 Joy Anything Goes + optional : add ribbon or lace
Word Art Wednesday - Anything Goes
Pearly Sparkles Challenge - Anything Goes

Thank you for your comments and all of the support you give me - you make blogging such an amazing place to be!! Your encouragement is such a blessing for me - it makes my day! God bless you!

{{{Hugs}}} and happy crafting

Sunday, January 19, 2014

Spellbinders - Enchancing Elements - Shades of Blue

This card is created using  the Spellbinders newly released Dies -  when I run one off I usually run off a few more so I have some on hand.  That is the case when I created my card for the Diamond Anniversary: Sneak peek and Giveaway

.  
I am using the same Dies - the patterned has been cut using the Gold Labels One  Spellbinders® Nestabilities® Imperial Gold Enhancing Elements dies and the Rounded Squares Nestabilities®.  The butterflies are from the Les Papillions Two Shapeabilities®.   I have used the Faux Letterpress Technique with the Gold Labels One Nestabilities and
IMAGINE Crafts®/Tsukineko® VersaMagic™ Chalk Pigment Ink in Aquatic Splash.


 The sentiment is from the JustRite® Papercraft Kindness stamp set and has been stamped using
IMAGINE Crafts®/Tsukineko® VersaFine™ Archival Pigment Ink in Onyx Black.  I have also used Seam Binding, an altered Vintage Button and Recycled Lace.  I have also used Want2Scrap© pearls and Scrapbook by Adhesives by 3L - E-Z Runner and 3D Foam Squares, along with a paper rose.


This card is for the following challenges: 
Allsorts - Use Buttons and Bows
Fantasy Stampers Challenge Blog – Anything with Wings 
Pumpkin spice - Buttons, Bows or Bling
Totally Gorjuss - Lace and Pearls 
A Creative Need - January - Die cuts/ Punches 
Brown Sugar Anything Goes 
Craftitude - Anything Goes/Ribbons & Pearls 
Sister Act Card Challenge - Anything Goes  
Aud Sentiments Challenge - Any Sentiment
  Card A Day Blog - Valentines, Thank You, Get Well Soon
Feeling Crafty Challenge - Butterflies
Ladybug Crafts - Give Thanks 
Creative Moments - Anything goes/Buttons and Pearls
Divas by Design - Ribbon 
Paper Shelter Challenge - Winter Blues
Whimsy Inspiration - Something new
 WordArt WednesdaysAnything goes (must be uplifting, no dark images or themes)

 Thank you for your comments and all of the support you give me - you make blogging such an amazing place to be!! Your encouragement is such a blessing for me - it makes my day! God bless you!

{{{Hugs}}}
Follow on Bloglovin