}
Showing posts with label Versafine. Show all posts

Thursday, January 14, 2016

Wonderful!! Something Old - Something New

Hello friends - Christmas is over for another year and 2016 is rolling along at a steady pace.  I am trying to balance my time in The Studio, but have to be honest and say that I need more time than I am spending there and often up in the early hours of the morning - not that I mind that - this is a very busy house and it is usually the only time I get the house to myself....I am sure you know what I am talking about,


Today's card is a mix of old and new - the stamps are retired stamps that are still favourites  I just have to ink them every now and then.


The Dies are Spellbinders of course - the cardbase and decorative layer have been created using Labels 46 and Labels Forty Six Decorative Element Nestabilities®.  The rose image has been layered onto two offset Lacey Circles Nestabilities® Decorative Elements in dark brown.  All of my Dies have been cut/embossed using the Platinum Die Cutting and Embossing Machine .


My images have been stamped using Imagine Crafts 'featuring' Tsukineko Versafine in Vintage Sepia - Versafiine is fabulous for those images with lots of fine details.   My card is held together by Scrapbook Adhesives by 3LThe bling ifrom Want2Scrap.   My sentiment is from the Penny Black Inc. Social Butterfly stamp set.


This card is linked to the following challenges:
Crafting for all Seasons - Monochrome 
Fresh Brewed Designs - Anything Goes
Paper Shelter Challenge - Punches and/or Dies 
Sisterhood of Crafters - Something Old, Something New 
Crafty Boots - Something Old, Something New
Our Crafty Corner - Always Anything Goes
Where the HeART is - Anything Goes
City Crafter Challenge - Butterfly, my butterfly
Lemon Shortbread Always Anything Goes
Paper Minutes Anything Goes
Retarte - Anything Goes
Tuesday Throwdown - Add Dimension

Thank you for your comments and all of the support you give me - you make blogging such an amazing place to be!! Your encouragement is such a blessing for me - it makes my day! God bless you!
{{{Hugs}}} and happy crafting

Sunday, June 14, 2015

Artist in Residence - All about Weddings Tutorial

I have an Artist in Residence Tutorial on the Imagine Crafts Blog - The theme is all about Weddings - don't we love to go to a wedding - I am sharing a tutorial for a nostalgic card - perfect for this occasion.


You can see the whole project and details by clicking HERE.  I would love you to pop over there and leave me a comment letting me know what you think - you know I love to see you!

Thank you for your comments and all of the support you give me - you make blogging such an amazing place to be!! Your encouragement is such a blessing for me - it makes my day! God bless you!

{{{Hugs}}} and happy creating!


Tuesday, March 4, 2014

Our Daily Bread Designs - Heart Whispers

Hello Blog Friends, it is always lovely to know that you have visited with me here - thank you for all of the support you give me - I appreciate it so much!


For this card I have used the A2 Modern Stationery Spellbinders® Nestabilities® Card Creator  for the card base and the 5 x 7 Modern Stationery  Spellbinders® Nestabilities® Card Creator for the sentiment.


The beautiful background stamp is the GRUNGE BUTTERFLY BACKGROUND from Our Daily Bread Designs and bas been stamped using IMAGINE Crafts®/Tsukineko® Memento Luxe™ Mixed Media Pigment Ink in Teal Zeal.  The sentiment from the LOVE YOU BUNCHES cling stamp set has been stamped using IMAGINE Crafts®/Tsukineko® VersaFine™ Archival Pigment Ink in Onyx Black.


The addition of layered flowers, lace and  Want2Scrap© Swirls Finesse - LeCreme are the finishing touches.


This card is for the following challenges:
Addicted to Stamps Challenge - Lace and Pearls
One Stitch At A Time - Anything Goes 
Robyn`s Fetish Anything Goes
My Sheri Crafts  - Bling it on
 WordArt Wednesdays - Anything goes (must be uplifting, no dark images or themes)
Make it Monday - Anything Goes
 Left of Center Creative Challenges - Die Cuts 
Keep It Simple! - Things with Wings

Thank you for your comments and all of the support you give me - you make blogging such an amazing place to be!! Your encouragement is such a blessing for me - it makes my day! God bless you!

{{{Hugs}}}
Follow on Bloglovin

Sunday, September 22, 2013

Textured Just a Note Card

Hello friends - I hope you are having a great weekend - mine is quickly coming to an end, but before it does I am sharing another of the 10 quick cards I created during the week.


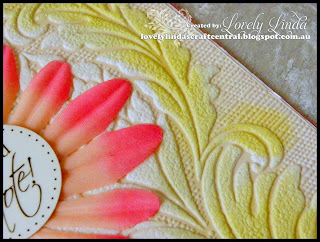
The 'flocked' patterned paper is none other than wallpaper.  One of my neighbours creates Victorian Dolls Houses and uses the tiny stripes on this wallpaper - and sometime ago knocked on our door a whole ago asking me if I would like the 'leftovers'!  How gorgeous is it!!

  I have done very little to it, apart from inking the flocked pattern on the left using IMAGINE Crafts®/Tsukineko® VersaFine™ Archival Pigment Ink in Spanish Moss, using a


The large flower has had some IMAGINE Crafts®/Tsukineko® Memento Luxe™ Mixed Media Pigment Ink in Angel Pink and Rose Bud added to the edges to add more depth to the already pink petals.  The sentiment is from SRM Stickers and has been popped up on
Scrapbook Adhesives by 3L® foam dots.


This card is for the following challenges: 
2 Sisters - Recycle  
Our Creative Corner - Forgotten Things
 So Artful Challenge - Single flower with minimalist design 
365 Cards - In The Garden 
Chocolate, Coffee & Cards - Anything Goes 
Jellypark Challenges - The Sentiment Is The Key 
Jo's Scrap Shack - Anything Goes
 Sister Act Card Challenge - Anything Goes 
Happy Campers - Show us your flowers

Thank you for your comments and all of the support you give me - you make blogging such an amazing place to be!! Your encouragement is such a blessing for me - it makes my day! God bless you! 
{{{hugs}}}
Follow on Bloglovin

Wednesday, July 17, 2013

AIR Tutorial #2 Stampotique Stamps

My second tutorial for July as an Artist in Residence for IMAGINE Crafts®/Tsukineko® is using Stampotique stamps that were very generously supplied to us...


  • StazOn - Jet Black
  • IMAGINE Crafts®/Tsukineko® Sponge Daubers™ 
  • IMAGINE Crafts®/Tsukineko® Tack ‘N Peel™ Reusable Cling Sheet 
  • IMAGINE Crafts®/Tsukineko® Morocco Memento™ Mixed Media Pigment Ink full ink pad in Bahama Blue


  • IMAGINE Crafts®/Tsukineko® VersaFine™ Archival Pigment Ink full ink pad in Vintage Sepia

Preferred Promotional Partners:


Other:  Want2Scrap - bling, glue, acrylic block, paper rose, crochet lace, stamp for sentiment


Stampotique gave the Design Team a choice of stamps - they are red rubber but not backed with cling foam, a perfect opportunity to use the IMAGINE Crafts®/Tsukineko® Tack ‘N Peel™ Reusable Cling Sheet.  This adhere to the acrylic block and the stamp beautifully.

I stamped two (2) images in IMAGINE Crafts®/Tsukineko® VersaFine™ Archival Pigment Ink in Vintage Sepia and one (1) image in IMAGINE Crafts®/Tsukineko® Morocco Memento™ Mixed Media Pigment Ink full ink pad in Bahama Blue.


Next sponge around the edges using Versafine Vintage Sepia and a IMAGINE Crafts®/Tsukineko® Sponge Dauber™, then layer it onto matching card stock using foam tape as shown in the photo below.


Stamp one (1) of the Stampotique image onto a scrap of Authentique Papers and cut the dress out - paper piece onto the Bahama Blue image, as shown below.


Emboss the Authentique Papers using the Spellbinders™ Grand Calibur Cutting Machine
and the Dotted Flowers Spellbinders® M-Bossabilities™ folder.  Rub the sanding block over the top of the paper, to lightly distress the raised pattern.


Adhere the embossed layer onto pink card stock, followed by brown, then add all of the layers onto the white card base, which is 30cm x 10cm folded in half, giving a card base of  15cm x 10cm - gently run your scissors around the edges of each layer (except for the white card base) for lightly distressed look. Next add the images, using double sided tape, as placed in the main photo in the following order:  Vintage Sepia by two followed by the Bahama Blue image.

The card is finished off by adding a row of Crochet Lace along the lower edge of the card, followed by a paper rose and a piece of the Want2Scrap bling either side of the rose.  The sentiment is stamped in Vintage Sepia, corners rounded and added along the top edge of the right hand image.


Thank you for your comments and all of the support you give me - you make blogging such an amazing place to be!! Your encouragement is such a blessing for me - it makes my day! God bless you!

{{{Hugs}}}