

Welcome to the Radiant Neon Blog Hop where we are joining together with the ladies from CardMaker and showcasing the divine Radiant Neon pigment inks. If you came from the lovely EmilyLanham 's Blog you are in the right place - if not then start at the CardMaker Blog and then go in order to the next blog.

Supplies:
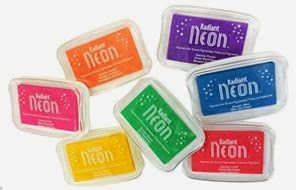
- IMAGINE Crafts/Tsukineko: Craft Mat; Radiant Neon Ink:Electric Coral, Electric Pink; Electric Yellow; Sponge Daubers; irRESISTible Spray - Black
- Spellbinders: Grand Calibur Machine; S5-217 A2 Modern Stationary Nestabilities® Card Creator; S4-425 Elegant Ovals Nestabilities Decorative Elements, Metal Shim plate
- Penny Black Inc.
- The Crafters Workshop: Mini Fifties Clock stencil 6x6
- Want2Scrap: 72 Count Black Gems - self adhesive
- Scrapbook Adhesives by 3L: E-Z Adhesive Runner
- Miscellaneous: liquid glue; Button

1. Place Stencil onto white card, secure with masking tape.
2. Apply Electric Coral to the center of the Stencil using a Sponge Dauber.
3. Repeat using Electric Pink
4.Followed by Electric Yellow
5. Add extra touches of colour where you want using the daubers without adding extra ink.
2. Apply Electric Coral to the center of the Stencil using a Sponge Dauber.
3. Repeat using Electric Pink
4.Followed by Electric Yellow
5. Add extra touches of colour where you want using the daubers without adding extra ink.

6. Cut/emboss the stenciled card using the Grand Calibur Machine and the Modern Stationary die.

7. Stamp the sentiment using Versafine Onyx Black on the lower right corner.
8. Cut card base using black card that has been cut using the largest Modern Stationery Die,making sure the folded line is just inside the top cutting edge of the Die to form card base.
9. Adhere stenciled layer to the base using double sided tape.
 xx
10. Cut/emboss one (1) butterfly from the Wonderful Wings Grand Nestabilities in black card.
11. Adhere to the center of the card using liquid glue.
12. Glue the button into the center of the butterflies body
13. Adhere a black bling to the center of the button
14. Finish by adding bling to the opposite corners of the card

Here is my card with two other samples I have created using the Radiant Neons - they live up to their name and make your projects shine!
* Your next stop on the Blog Hop is SharonMorrison
Here is a list of the Blogs for this Hop - incase there is a glitch along the way.
CardMaker Magazine * SylviaBlum * NaghmaHusain * Jeanne Streiff *
MaureenCronin * AllieGower * IshaGupta * KathyMartin * EmilyLanham
* LindaLucas (you are here) * SharonMorrison * KristieHartfeil * EllenTaylor
* TaylorUsry * PennyWard * KristineReynolds * CathyAndronicou * BaerbelBorn *
Savannah O'Gwynn * SabrinaAlery * KazukoKocho * NancyHawes * VeraYates
* DebbieGaetz * JohnPetersen * ImagineCrafts
Thank you for your
comments and all of the support you give me - you make blogging such an amazing
place to be!! Your encouragement is such a blessing for me - it makes my day!
God bless you!
{{{Hugs}}}


