}
Showing posts with label CAS. Show all posts

Friday, November 2, 2018

Owls and Birthday Wishes

Hello friends and thanks so much for stopping by. Today I have a whimsical card today using Owls patterned paper - so cute and the colours are gorgeous too - don't you think.  This is a very CAS (Clean and Simple) card as you will see.


The patterned paper is from Kaisercraft and has been cut/embossed using the second largest die from the Spellbinders A2 Curved Matting Basics B Card Creator Etched Dies and the Platinum Die Cutting Machine. This has been popped up onto a teal card base that has been cut using the largest die from A2 Curved Matting Basics B Card Creator Etched Dies  - making sure the fold is inside the cutting edge to form the top of the card base - using Scrapbook Adhesives BY 3L 3D Foam Squares.

The sentiment is a free one from Australian Simply Cards and has been stamped using Imagine Memento Ink in Tuxedo Black, trimmed and popped up onto the lower left side of the card front. Want2Scrap  Baby Bling - Turquoise Rhinestones have been adhered to the bows on the 'girl' owls.

This card is linked to the following challenges:
Simon Says Wednesday - Anything Goes
Word Art Wednesdays Anything Goes
Die Cuttin' Divas - Anything Goes 
Lemon Shortbread - Always Anything Goes
Retarte - Anything Goes
Through The Craft Room Door - Always Anything Goes 
Crafting from the Heart - ANYTHING GOES
CuteNCrafty Challenge Blog - ANYTHING GOES
Double Trouble Challenges - SOME THING, ANY THING, EVERY THING
Incy Wincy Designs - HAPPY BIRTHDAY
A Gem of a Challenge - Anything Goes

Take care friends - thank you for your comments and all of the support you give me - you make blogging such an amazing place to be!! Your encouragement is such a blessing for me - it makes my day! God bless you!

{{{Hugs}}} and happy crafting

Saturday, June 24, 2017

Spellbinders BIG Birthday

Hello Friends!  Today I am sharing a card created using Spellbinders Happy Birthday Easel Celebrate the Day by Marisa Job - it makes quite a statement don't you think?!?  Not only that - this could be the quickest layered card you are likely to create - now that I have your attention...LOL!


The card front has seen embossed using the Grid Embossing Folder on white card stock.  I have trimmed the Happy Birthday Easel to make it single sided and adhere to the lower portion of the card front using liquid glue.  The 'happy' has been created using stickers from my stash!

The card front has been layered onto a pre-cut card base using  Scrapbook Adhesives by 3L 3D Foam Squares - and there you have it - it is as easy as that!!   


This card us linked to the following challenges:
Craft Rocket Challenges - For The Men/Boys
Seize The Birthday - Birthday + Optional Topping of Anything Goes
Inspiration Destination - Anything Goes
The Crafty Addicts - Anything Goes - Option of Die Cuts
Everybody-Art-Challenge - Happy Birthday 
Stamps & Fun = Creativity - INSPIRED BY A SONG (Happy Birthday to You)
Crafty Girlz Challenge - Anything Goes + option of Masculine
Dies R Us Challenge) - Always Anything Goes
One Crazy Stamper - Anything Goes

Thank you for your comments and all of the support you give me - you make blogging such an amazing place to be!! Your encouragement is such a blessing for me - it makes my day! God bless you!

{{{hugs}}} and happy crafting

Sunday, March 8, 2015

Artist in Residence - Watercoloring


I am sharing a tutorial as an Artist in Residence for Imagine Crafts - and I am watercolouring using Inks and Spellbinders M-Bossabilities - don't you love that effect and it is so easy!


You can see the whole project and details by clicking HERE.  I would love you to pop over there and leave me a comment letting me know what you think - you know I love to see you!


I used the back and the front of the M-Bossabilities and got two different results as you can see above! 

Thank you for your comments and all of the support you give me - you make blogging such an amazing place to be!! Your encouragement is such a blessing for me - it makes my day! God bless you!

{{{Hugs}}}


Wednesday, July 30, 2014

Scripted Flowers

I am definitely a shabby/vintage person at heart - vintage would definitely be my 'first love'. but I have to be honest and say that I am inspired by so many styles I see both in Blogville and Pinterest, I am always inspired to try different styles.


CAS (Clean and Simple) is one style I admire but I have to admit I didn't always find it easy - infact it took me longer to create a CAS card than my layered eclectic cards...but the more I do it, the easier it seems.


I have used a Script stamp for my base, using IMAGINECrafts®/Tsukineko® Memento™ Dye Ink in Teal Zeal.  The Snapshot Spellbinders® Shapeabilities® has been cut using Black cardstock and adhered to the side.  The flower is from my collection and has been adhered using liquid glue.


IMAGINE Crafts® Fireworks!™ Craft Spray in Pink has been both sprayed and dripped onto the card base.  Finishing off with some randomly placed sequins.  Scrapbook by Adhesives by 3L - 3D Foam Squares and E-Z Runner have been used on this card.


This card is linked to the following challenges: 
Crafty Sentiment Designs - Anything Goes 
Die Cuttin' Divas - Anything Goes 
Artistic Inspirations - Anything Goes/ Color
The Crazy Challenge - Die cuts and punches
 613 Avenue Create  Anything Goes w/optional use a sentiment 
Hobbycutz - Anything Goes


Thank you for your comments and all of the support you give me - you make blogging such an amazing place to be!! Your encouragement is such a blessing for me - it makes my day! God bless you!

{{{Hugs}}}
Follow on Bloglovin

Friday, July 25, 2014

Dandylion Wishes

When you have quite a few Dies (which I 'may' do LOL!) it is easy to overlook one every now and then - I realised I have not used the Dandylion Spellbinders® Shapeabilities® and just had to rectify that!


I have created a fairly CAS card (Clean and Simple) layering the cut/embossed  Dandylion Die onto the Beaded Ovals Spellbinders® Nestabilities Decorative Elements.  All Dies have been cut/embossed using the  Spellbinders Grand Calibur® Machine.


Glitter has been added to the dandelion to add a 'whimsical' touch.  I don't know about you, but just seeing this dandelion takes me back to my childhood, where we used to love blowing the 'fluff' or 'fairies' off the head of the dandelion - we didn't worry about the weeds that could grow because of them - we just 'lived out loud!'


The 'make a wish' sentiment is from SRM Stickers. The larger sentiment is by Stampin' Up! - probably retired by now I would think, but a fabulous set!   Scrapbook by Adhesives by 3L - 3D Foam Squares and E-Z Runner have been used on this card.  

This card is for the following challenges:
613 Avenue Create: Anything Goes
Just Keep on Creating - Anything Goes
 Scribble and Scrap: Anything Goes
Word Art Wednesday: Anything goes with uplifting sentiment
Through the Craft Room Door - Anything Goes
Hobbycutz - Anything Goes
Crafting from the Heart - Anything Goes
Creative Fingers - Anything Goes
The Crafters Cafe - Anything Goes
The Paper Shelter - Anything Goes
Pennys Paper Crafty - Anything Goes
Crafty Girls - Anything Goes
Little Miss Muffet - Anything Goes 
Sisterhood of Crafters  - Diecuts/Punches
 Wonderful Wednesdays - Always Anything Goes

Thank you for your comments and all of the support you give me - you make blogging such an amazing place to be!! Your encouragement is such a blessing for me - it makes my day! God bless you!

{{{Hugs}}}
Follow on Bloglovin


Tuesday, April 22, 2014

Spellbinders Tuesday Video Tutorial - CAS Cards


 It is Tuesday Video Tutorial Time on the Spellbinders Blog - this week the theme is CAS cards with a maximum of two Dies - if you know me, you know this has it's own challenges BUT I managed to add my own personal twist...


I would love you to pop over and check it out and leave me a comment letting me know what you think - you can see it HERE


Thank you for your comments and all of the support you give me - you make blogging such an amazing place to be!! Your encouragement is such a blessing for me - it makes my day!  God bless you!

{{{Hugs}}}
Follow on Bloglovin

Friday, April 4, 2014

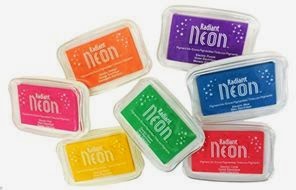
Radiant Neon Blog Hop

 
Welcome to the Radiant Neon Blog Hop where we are joining together with the ladies from CardMaker and showcasing the divine Radiant Neon pigment inks.  If you came from the lovely EmilyLanham 's Blog you are in the right place - if not then start at the CardMaker Blog and then go in order to the next blog.


Supplies:
  • IMAGINE Crafts/Tsukineko: Craft Mat; Radiant Neon Ink:Electric Coral, Electric Pink; Electric Yellow; Sponge Daubers; irRESISTible Spray - Black
  • Spellbinders: Grand Calibur Machine; S5-217 A2 Modern Stationary Nestabilities® Card Creator; S4-425 Elegant Ovals Nestabilities Decorative Elements, Metal Shim plate
  • Penny Black Inc.
  • The Crafters Workshop: Mini Fifties Clock stencil 6x6
  • Want2Scrap: 72 Count Black Gems - self adhesive
  • Scrapbook Adhesives by 3L: E-Z Adhesive Runner
  • Miscellaneous:  liquid glue; Button
Directions:


1. Place Stencil onto white card, secure with masking tape.
2. Apply Electric Coral to the center of the Stencil using a Sponge Dauber.
3. Repeat using Electric Pink
4.Followed by Electric Yellow
5. Add extra touches of colour where you want using the daubers without adding extra ink.


6. Cut/emboss the stenciled card using the Grand Calibur Machine and the Modern Stationary die.


7. Stamp the sentiment using Versafine Onyx Black on the lower right corner.
8. Cut card base using black card that has been cut using the largest Modern Stationery Die,making sure the folded line is just inside the top cutting edge of the Die to form card base.
9. Adhere stenciled layer to the base using double sided tape.


10. Cut/emboss one (1) butterfly from the Wonderful Wings Grand Nestabilities in black card.
11. Adhere to the center of the card using liquid glue.
12. Glue the button into the center of the butterflies body
13. Adhere a black bling to the center of the button
14. Finish by adding bling to the opposite corners of the card


Here is my card with two other samples I have created using the Radiant Neons - they live up to their name and make your projects shine!

* Your next stop on the Blog Hop is  SharonMorrison 


Here is a list of the Blogs for this Hop - incase there is a glitch along the way.


Thank you for your comments and all of the support you give me - you make blogging such an amazing place to be!! Your encouragement is such a blessing for me - it makes my day! God bless you!

{{{Hugs}}}
Follow on Bloglovin

Friday, September 27, 2013

So Happy for You

I have always loved this patterned paper from  My Mind's Eye™ and decided it was too pretty to cover up. 


The simple addition of a strip of patterned paper, a sentiment from  from SRM Stickers and the bling is Baby Bling from Want2Scrap©


Along with an embellishment from Authentique™ Paper.    This has been cut one using the Spellbinders® Grand Calibur® Machine and the Standard Circles SM Spellbinders® Nestabilities®


This card is for the following challenges: 
Our Creative Corner - Forgotten Things 
Oozak - Anything Goes/Die Cuts/Punches 
4 Krafty Girlz - Anything Goes 
A.R.T. Card Challenge - Anything Goes
 Crafting By Designs - Anything goes 
Simon Says Stamp - Anything Goes 
Cuttin & Stampin Challenges - Use Your Scraps
Crafters Cafe Challenge - Die cuts or punches

 
Thank you for your comments and all of the support you give me - you make blogging such an amazing place to be!! Your encouragement is such a blessing for me - it makes my day! God bless you! 
 
{{{hugs}}}
Follow on Bloglovin