}

Saturday, April 8, 2017

Flourishes lc - March/April New Release Day 6 - Easter Bunnies

Hello friends, welcome to Day 6  Flourishes LC March/April New Release.  We have some wonderful Eye Candy to share with you this week. Today we are showcasing the wonderful  Easter Bunnies stamp set illustrated by Lauren Pope.


The image has been stamped onto Flourishes Classic White card stock using black ink and coloured using Chameleon Pens.  It has been fussy cut/hand cut using scissors popped up using Scrapbook Adhesives by 3L 3D Foam Squares onto a Pierced Rectangle that has been lightly sanded to add a slightly distressed look.


  This has been popped up onto Die Cut patterned paper with a narrow strip of card stock added across the centre.


 A double seam Binding bow adhered to the left side of the image, finishing with a filigree button. The layers have been popped up onto a pre-cut white card base.


Be sure to visit the Flourishes LC and check out the new release and cards by the Designers.

Take care friends - thank you for your comments and all of the support you give me - you make blogging such an amazing place to be!! Your encouragement is such a blessing for me - it makes my day! God bless you!

{{{Hugs}}} and happy crafting

Wanr2Scrap Happy Birthday Sneak Peek

Hello Friends -  I am sharing a pretty floral card on the Want2Scrap Blog,  using Want2Scrap Beautiful Bling Borders and Blue pearls - how pretty are those pearls!?


You can see all of the details and the project in full by clicking HERE -  I would love to hear what you think.

Thank you for your comments and all of the support you give me - you make blogging such an amazing place to be!! Your encouragement is such a blessing for me - it makes my day! God bless you!
{{{hugs}}} and happy crafting


Friday, April 7, 2017

Flourishes LC March/April New Release - Day 5 So this is Easter

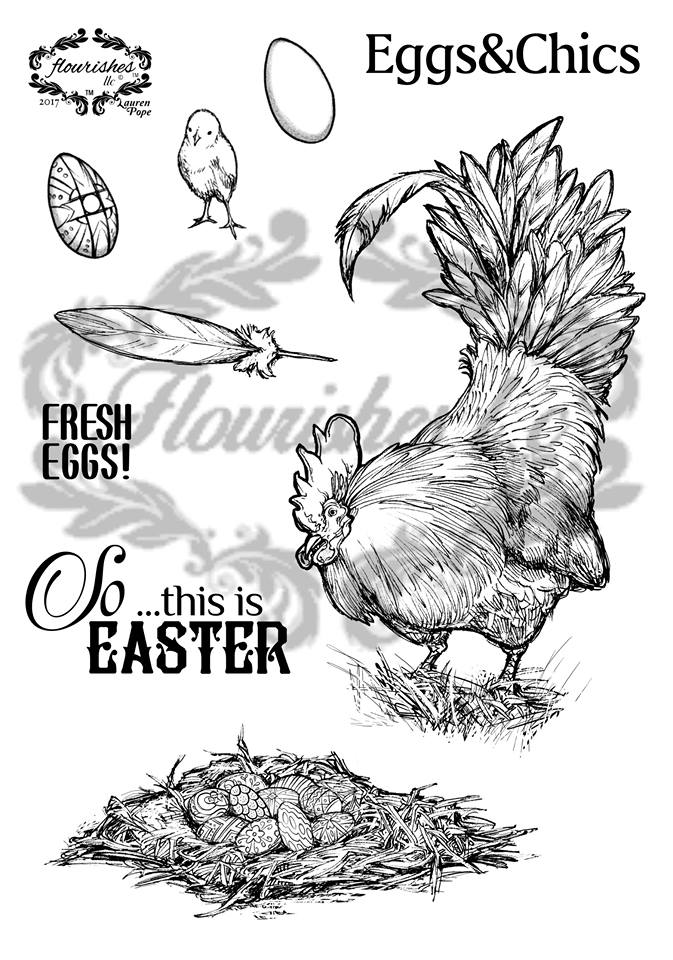
Hello friends, welcome to Day 5 of the Flourishes LC March/April  New Release.  How are you liking the new stamp sets so far - beautiful aren't they. We have some more sets to share with you this week. Today we are showcasing the wonderful So this is Easter stamp set illustrated by Lauren Pope - what a Spectacular Rooster - this image is not limited to Easter -looking forward to more creating with him.


The Rooster image has been stamped onto Flourishes Classic White card stock using black ink and coloured using Chameleon Pens.  It has been fussy cut/hand cut using scissors popped up using Scrapbook Adhesives by 3L 3D Foam Squares onto a Classic Oval that has had torn and sponged green card stock adhered to the lower portion and sky sponged above the torn paper.


The sentiment banner has also been stamped onto Flourishes Classic White card stock using black ink .  It has been fussy cut/hand cut using scissors popped up using Scrapbook Adhesives by 3L 3D Foam Squares above the image...and that cute little chick - comes with the set too!!


  This has been popped up onto Die Cut patterned paper with narrow seam binding added across the centre and a button adhered to the left side of the oval. The layers have been popped up onto a pre-cut white card base.


Be sure to visit the Flourishes LC and check out the new release and a card by some of the other Designers.

Take care friends - thank you for your comments and all of the support you give me - you make blogging such an amazing place to be!! Your encouragement is such a blessing for me - it makes my day! God bless you!

{{{Hugs}}} and happy crafting

Thursday, April 6, 2017

Flourishes lc - March/April New Release Day 4 - Christ is Risen

Hello friends, welcome to Day 4 of the Flourishes LC March/April New Release.   The Senior Designers and Friends of Flourishes have some more fabulous inspiration to share with you and today we are showcasing the He has Risen stamp set.  I always love to see a faith inspired stamp set - especially at such a time as Easter - He is Risen indeed!!


The cross image has been stamped onto Flourishes Classic White card stock using black ink and coloured using Chameleon Pens.  It has been fussy cut/hand cut using scissors and popped up onto a Die cut using Scrapbook Adhesives by 3L 3D Foam Squares and onto Classic White card stock  that has been stamped using Tartan Plaid Background stamp and a Kaleidacolor Ink.

The sentiment banner has also been stamped onto Flourishes Classic White card stock using black ink .  It has been cut/embossed using the tag from the Perfectly Pierced Classic Hourglass Die   popped up using Scrapbook Adhesives by 3L 3D Foam Squares to the right of the Cross.


The layers have been popped up onto a pre-cut Kraft card base that has been cut slightly larger than the stamped layer.


Be sure to visit the Flourishes LC and check out the new release and some inspiration from some of the designers.

Take care friends - thank you for your comments and all of the support you give me - you make blogging such an amazing place to be!! Your encouragement is such a blessing for me - it makes my day! God bless you!
{{{Hugs}}} and happy crafting

Spellbinders Market Fresh Tutorial Sneak Peek

I am sharing on the Spellbinders Blog - using the Market Fresh Collection by Licensed Designer Debi Adams - what is not to love with this collection - it really is 'good enough to eat!'


You can find the full tutorial with Step by Step photos HERE

Thank you for your comments and all of the support you give me - you make blogging such an amazing place to be!! Your encouragement is such a blessing for me - it makes my day! God bless you!

{{{hugs}}} and happy crafting

Wednesday, April 5, 2017

Flourishes lc March/April New Release - Day 3 Vintage Easter

Hello friends, welcome to Day 3 of the Flourishes LC March/April New Release.   The Senior Designers and Friends of Flourishes have some fabulous inspiration to share with you this week. Today we are showcasing the adorable Vintage Easter stamp set.


The basket and the chick have been stamped onto Flourishes Classic White card stock using black ink and coloured using Chameleon Pens.  They have been fussy cut/hand cut using scissors and popped up onto a  Tailor-Made Classic Keyhole Die Set .  The Die has been used as a Stencil, sponging Delicata in Golden Glitz and a Sponge Dauber. using Scrapbook Adhesives by 3L 3D Foam Squares.


The patterned paper has been cut into squares and layered onto recycled cardboard, cut to size using a Matting Die.  Each of the squares has been paper pierced by hand.  This has all been adhered to a pre-cut card base using Adhesive Sheets 4 x6 prior to cutting. A row of pink seam binding has been pleated onto the lower portion of the card front, a double seam binding bow has been adhered using liquid glue, finishing off by adding a small button and Want2Scrap pearls to the centre.

Be sure to visit the Flourishes LC and check out the new release and a cards by the designers.

Tuesday, April 4, 2017

Flourishes lc - March/April New Release Day 2 - Plaid Background

Hello friends, welcome to Day 2 of the Flourishes LC March/April New Release.   The Senior Designers and Friends of Flourishes have some fabulous inspiration to share with you this week. Today it is all about the Plaid Background.


The cup image has been stamped onto Flourishes Classic White card stock using black ink and coloured using Chameleon Pens.  It has been Cut.embossed using Standard Circles  and popped up onto a larger circle in Toffee using Scrapbook Adhesives by 3L 3D Foam Squares.


The sentiment banner has also been stamped onto Flourishes Classic White card stock using black ink .  It has been fussy cut/hand cut using scissors popped up using Scrapbook Adhesives by 3L 3D Foam Squares above the image.


  This has been popped up onto Die Cut patterned paper with narrow seam binding added across the centre and a button adhered to the left side of the oval. The layers have been popped up onto Classic White card stock  that has been stamped using Tartan Plaid Background stamp and a Kaleidacolor Ink  a pre-cut white card base.


Be sure to visit the Flourishes LC and check out the new release and a card by Toni Story

Take care friends - thank you for your comments and all of the support you give me - you make blogging such an amazing place to be!! Your encouragement is such a blessing for me - it makes my day! God bless you!

{{{Hugs}}} and happy crafting

Monday, April 3, 2017

Flourishes LC March/ April New Release Day1 - Thistle

Hello everyone - welcome to Day 1 of  Flourishes LC March/ April New Release Today we are going to see our newest set called Thistles illustrated by Lauren Pope -such a pretty set.


The image has been stamped onto Flourishes Classic White card stock using black ink and coloured using Chameleon Pens.   


The Florentine Fame with Quote been stamped around the Thistle using black ink and lightly coloured using Chameleon Pens


The Florentine Fame  been stamped around the Thistle using black ink and lightly coloured using Chameleon Pens.  The sentiment from the Small Words of Love and Kindness stamp set has been stamped using Tuxedo Black Ink and trimmed to size, popped up onto green card stock, cut slightly larger using Scrapbook Adhesives by 3L 3D Foam Squares, this has been layered onto a the image layer, next all layers are adhered to the pre-cut card base.  Finishing off using Want2Scrap green pearls.


Be sure to visit the Flourishes LC and check out the new release and cards by Michelle Hahn and 
Take care friends - thank you for your comments and all of the support you give me - you make blogging such an amazing place to be!! Your encouragement is such a blessing for me - it makes my day! God bless you!

{{{Hugs}}} and happy crafting

Spellinders Feathers by Stephanie Low Tutorial

Hello friends, time for a Spellbinders Tutorial - I am using another of the beautiful stamp and die sets by Licensed Designer Stephanie Low.  I do love the way these work together and help is create something so special with such ease.  I have created something quite CAS (Clean and Simple) for me - and enjoyed the process immensely and I hope you do too! 


Spellbinders Products:

1. Stamp the feather using black ink.
2. Colour using Chameleon Pens.
3. Cut/emboss using the  Platinum 6 Die Cutting and Embossing Machine

4. Stamp white card stock using Seth Apter Splatter stamp and Electric Orange Ink
5. Cut/emboss using A-2 Matting Basics A Card Creator Etched Dies # (#1 being the smallest)
6. Fold dark pink card stock in half and cut/emboss using the A-2 Matting Basics A Card Creator Etched Dies # (#1 being the smallest) - making sure the fold is inside the cutting edge to create a card base.

7. Pop the stamped background onto the card base using 3D Foam Squares.
8. Pop up the Feather using 3D Foam Squares
9. Adhere the computer generated sentiment to the lower portion of the card front
10.Randomly adhere the sequins to the card front.

Take care friends - thank you for your comments and all of the support you give me - you make blogging such an amazing place to be!! Your encouragement is such a blessing for me - it makes my day! God bless you!
{{{Hugs}}} and happy crafting

Saturday, April 1, 2017

Want2Scrap Beautiful Roses and Bling Borders

Hello Friends -  I am sharing a pretty and elegant card on the Want2Scrap Blog - using Want2Scrap Silver Rhinestones and pearls - The Beautiful Bling Borders are so versatile and the pearls - well - you must now by now what a favourite they are with me!


You can see all of the details and the project in full by clicking HERE.  I would love to hear what you think.

Thank you for your comments and all of the support you give me - you make blogging such an amazing place to be!! Your encouragement is such a blessing for me - it makes my day! God bless you!
{{{hugs}}} and happy crafting