}
Showing posts with label Home Decor. Show all posts

Tuesday, July 3, 2018

Little Birdie Crafts - Vertical Garden

Hello friends, thank you for stopping by and for the comments you have left – every one of them is read and appreciated!  I am shring a post on the Little Birdie Crafts Blog today with the Succulent theme in mind -  I have creating a Vertical Garden – I have seen these done on garden walls – but this one will be a home decor piece. 


You can see how I have created it as you follow along with the tutorial HERE


Thank you for your comments and all of the support you give me - you make blogging such an amazing place to be!! Your encouragement is such a blessing for me - it makes my day! God bless you!

{{{hugs}}} and happy crafting


Monday, March 19, 2018

Spellbinders Fun Door Sign Tutorial

Hello friends - thanks for stopping by - today I have a tutorial for Spellbinders to share with you using some of the fabulous Die D-Lites to create a door sign for our grandson.  It is one of those projects you see in a shop and think - I can make that - well I did and had everything I needed - you have to love that!!


The Die D-lites are such a great size for this kind of project and so many different ones to choose from.

1. Paint the sign using blue paint.
2. Tear varying shades of green card stock and adhere to the sign using liquid glue.
3. Add smaller strips of kraft card stock near the base of the sign and glue to the sign to form roads.
4. Cut/emboss the three Dies from the Tractors Die D-Lites and yellow card stock.
5. Use the Die as a stencil and sponge inside the cutting edges using Electric Orange ink and the wheels using Golden Glitz.
6. Adhere the Diggers/Tractors using Scrapbook Adhesives by 3L; Extreme Double Sided Tape.
7. Draw around each window using a Black pen
8. Add some Glossy Accents to each window and allow to dry.
9. Cut/emboss two clouds from the Rise 'n Shine Etched Dies using white card stock.
10. Adhere above the hills using Extreme Double Sided Tape.
11. Add some white stars and some sponging using white paint.
12. Cut/emboss the name for the sign using the Alphabet Etched Dies and Black Card Stock.
13. Adhere to the top right side of the sign.
14. Adhere fine granite/gravel to the diggers and randomly along the path.
15. Spray with Satin Sealer


Spellbinders Products:
Other Supplies: Chipboard sign;Yellow, green, white and Kraft card stock; Scrapbook Adhesives by 3L: Extreme Double Sided Tape, 3D Foam Squares; Liquid Glue; Imagine: Radiant Neon Ink in Electric Orange; Delicata Ink in Golden Glitz, Sponge Daubers; Blue Paint; Granite/gravel; Liquid Glue; Glossy Accents; Satin Sealer

Thank you for your comments and all of the support you give me - you make blogging such an amazing place to be!! Your encouragement is such a blessing for me - it makes my day! God bless you!

{{{hugs}}} and happy crafting

Thursday, February 2, 2017

Spellbinders Thankful Heart Sneak Peek

I have a new Tutorial on the Spellbinders Blog showcasing the Platinum Embossing and Die Cutting Machine - using Burlap - and what better than an adorable Home Decor Thankful Heart. You can find the project and tutorial HERE.


Thank you for your comments and all of the support you give me - you make blogging such an amazing place to be!! Your encouragement is such a blessing for me - it makes my day! God bless you!
{{{Hugs}}} and happy creating!

Wednesday, October 5, 2016

Spellbinders Robo Star Tutorial

Hello friend - I am sharing a tutorial for Spellbinders today - I have up-cycled a door hanger for our grandson, Noah, who is 18 months old and although still a baby he is growing so fast so it needed to be suitable for the little boy he is quickly becoming every day - Spellbinders Robo Star by Licensed Designer Seth Apter (of The Altered Page) are perfect - for any age - and any project.


Spellbinders Products:

1. Cut/emboss one (1) Robo Star #1 #2 #3 (#1 being the smallest) using Sea Spray cardstock.
2. Using scissors, cut the star from the cardstock - you only need to do this in the one place.

3. Arrange the Diecut Robo Stars onto the door hanger that has been precovered using patterned paper.
3. Adhere the Robo Stars using liquid glue.
4. Draw around both the inside and outside of each star using a black Sharpie or similar

5. Add name stickers across the large Robo Star.
6. Adhere Washi Tape around the hanger' and where the patterned paper joins.
7. Apply a coat of sealant.

Take care friends and Thank you for your comments and all of the
 support you give me - you make blogging such an amazing place to be!! Your encouragement is such a blessing for me - it makes my day! God bless you!

{{{Hugs}}} and happy creating


Wednesday, July 15, 2015

International Ambassadors 'Anything But a Card' Unofficial Blog Hop

Welcome to the International Ambassadors Unofficial 'Anything But a Card' Blog Hop!  As you may have caught on the International Ambassadors are getting together to 'play' with Spellbinders Dies every month and it comes around so quickly - this Blog Hop is purely for fun and inspiration, totally unofficial and an opportunity for you to get to know us (and our styles) more.


This month we are creating 'Anything But a Card'

Spellbinders Products:
Cross Promotional Partners:

Other:  Lace flowers, handmade resin embellishments,


1. Cut/emboss Belly Band Two # 1 #2 #3 using white cardstock (#1 being the smallest)
2.Cut each using scissors, at the desired length


3. Using the Die as a stencil, sponge inside the die using Teal Zeal ink and a Sponge Dauber
4. Before removing the Die, lightly stamp the music using Bamboo Leaves
5. Remove the Die
6. Thread the ribbon through the Die Cut slots.


9.  Adhere the Die cut label to the tin using liquid glue
10 Thread ribbon through the second slot and adhere underneath the label
11 Adhere lace flowers using liquid glue
12 adhere ribbon across the lower portion of the label as shown
13 Attach resin embellishment using liquid glue
14 Add White Pearls to the butterfly body
15 Add stickers to the label


I have used:


hope you have enjoyed my tutorial, make sure you pop in and visit the other International Ambassadors - these girls are amazing - each one is picked to be an Ambassador for their country because they are seasoned designers and so inspiring!!  The list of International Ambassadors is below, in case you get lost along the way.


Linda Lucas - Australia (you are here)
  Yvonne van de Grijp - Netherlands
Christine Emberson - England

Thank you for your comments and all of the support you give me - you make blogging such an amazing place to be!! Your encouragement is such a blessing for me - it makes my day! God bless you!
{{{Hugs}}}


Monday, March 2, 2015

Want2Scrap Tutorial -

I am back a card on the Want2Scrap Blog - showing you how I UPCYCLED a plastic container and turned it into something beautiful!


You can see the details HERE!  I would love you to pop across and let me know what you think!
Thank you for your comments and all of the support you give me - you make blogging such an amazing place to be!! Your encouragement is such a blessing for me - it makes my day! God bless you!

{{{Hugs}}}s}}}

Friday, May 23, 2014

Imagine Crafts and Stampendous Blog Hop


***This post will stay at the top of my Blog until the Blog Hop
Please scroll down for newer posts***


Stampendous and Imagine Crafts Header


Welcome to a week of fantastic collaboration between IMAGINE Crafts and Stampendous! We have to admit that our two companies were made for each other and we're proud to have shared a long relationship of working together.  After all, what are stamps with out ink?  The projects created by our artists this week feature IMAGINE Crafts Radiant Neon™ inks paired perfectly with coordinating colors of Fran•táge Color Fragments from Stampendous, along with some of their newest stamp designs and Stack Art kits.

Prizes galore for participating in the Blog Hop this week!


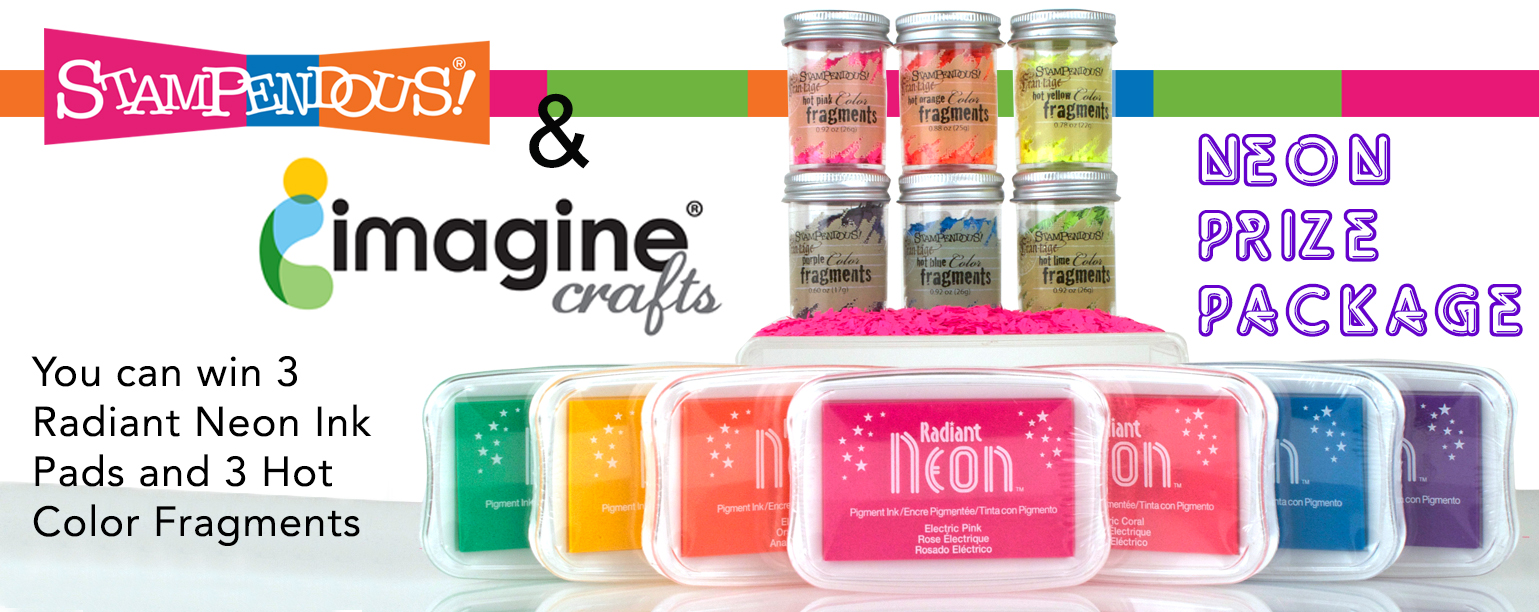
We'll be giving three prize packages of 3 Radiant Neon inks and 3 Fran•táge Color Fragments (we'll choose your colors). There will be a bright crafting future ahead of you!  Each day we’ll post that day's participating artists.  Visit their blog and leave a comment by midnight PST May 25th.  We ‘ll randomly select three different blogs from the five days, then randomly draw one commenter from each blog. You must have a U.S. mailing address to win, but we’d love for everyone to hop and comment! You can check out the Official Rules for all our contests if you have questions. So are you ready for some exciting inspiration? Here's who is hopping today:

Kristine Reynolds

Isha Gupta

Tobi Crawford

Penny Ward

Janelle Stollfus

Linda Lucas

Tina McDonald

***Blog Hop Hint – if you click on a link that takes you to a page saying something like, “Sorry this page cannot be found,” just click on the header at the top of the blog (usually a picture, or the blog’s name), and it will take you to that blog’s most recent post. That post *should* be our hop. If not, you can probably scroll down a short way to find the hop post.


Supplies:
  • IMAGINE Crafts/Tsukineko: Radiant Neon Pigment Ink in Electric Blue; Craft Mat; Memento Luxe™ Mixed Media Pigment Ink in Wedding Dress; Sponge Daubers™
  • Stampendous -
  • Want2Scrap: 72 Count - Pink Rhinestones - Self Adhesive
  • Other: Scrapbook Adhesives by 3L E-Z Runner, 3D Foam Squares, Pink Lace, Paper Rose, Kindy Glitz/Liquid Glue, Liquid Glue
Method:


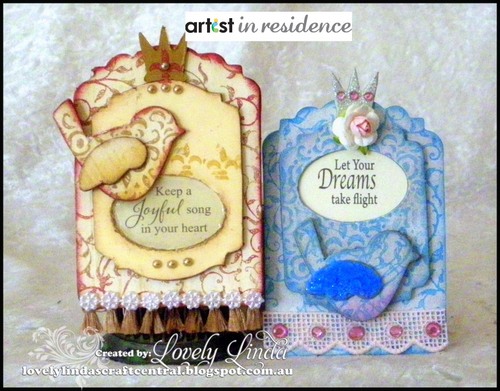
Step 1. Using Wedding Dress and a Sponge Dauber, ink the Chipboard on the front and edges

2014-04-022 2014_May_LL_Stampendous_Step 2

Step 2. Using Electric Blue stamp the chipboard using the
Step 3. Use a sponge Dauber and Electric Blue and sponge around the edges of the bird and wing.

2014-04-023 AIR_ 2014_May_LL_Stampendous_Step 3

Step 4. Adhere matching adhesive shape to the wing and cover with  Blue Color Fragments
Step 5. Apply liquid glue and add more Fragments, apply a little pressure to ensure they stick.
Step 6. Adhere the wing to the bird using liquid glue

2014-04-024 AIR_ 2014_May_LL_Stampendous_Step 4

Step 7. Cut out sentiment from the sheet
Step 8. Adhere to the back of the oval cut out
Step 9. Adhere the larger stamped chipboard
Step 10. Adhere lace to the lower portion of the large chipboard

2014-04-025 AIR_ 2014_May_LL_Stampendous_Step 5

Step 11. Attach the bird under the sentiment using liquid glue
Step 12. Cover the crown with liquid glitter
Step 13. Adhere paper rose using liquid glue
Step 14. Adhere bling to the crown and along the lace.

AIR 2014_May_LL_Stampendous_Main_Brown x2 wm

I make sure you leave your comment below so that you can be entered into the contest for the great prize package.

Thank you for your comments and all of the support you give me - you make blogging such an amazing place to be!! Your encouragement is such a blessing for me - it makes my day! God bless you!

{{{Hugs}}}
Follow on Bloglovin

Tuesday, February 4, 2014

Spellbinders Tuesday Video Tutorial - Valentines Party/Home Decor


I am excited to be sharing the Tuesday Video Tutorial on the Spellbinders Blog today - the theme this week is Valentines Party/ Home Decor I am sharing something special and so easy to create - you can see the project by clicking HERE.


Thank you for your comments and all of the support you give me - you make blogging such an amazing place to be!! Your encouragement is such a blessing for me - it makes my day! God bless you!


{{{hugs}}} 


Follow on Bloglovin

Saturday, January 18, 2014

Spellbinders - A Gilded Life - Crown Bezel

 I am back with another Bezel to share with you - I told you it is addictive and believe me - there are many more to come!!  This time I am using the divine Crown Bezel - Large - A Gilded Life Bezel from Spellbinders


The Silver Precious Metals Premium Craft Foil has been cut/ embossed using the Crown Circle die template and the Artisan X-plorer Machine.   I have embellished it using a Glass Stone and Want2Scrap© - Baby Bling.  Finishing off with ICE Resin®. The Glass Stone is actually rounded but the dimension disappeared using the Ice Resin.

  This is a very quick and easy project - but I have to be honest and say - the Bezel does a lot of the work - don't you agree!!

 Thank you for your comments and all of the support you give me - you make blogging such an amazing place to be!! Your encouragement is such a blessing for me - it makes my day! God bless you!

{{{Hugs}}}
Follow on Bloglovin

Friday, January 17, 2014

Spellbinders and A Gilded Life Media Mixage

A very quick share for me today, I am busy working on some projects for a Publication later this year, but just had to share this project I created using the new Fleur Bezel - Large  - A Gilded Life Bezel from Spellbinders


The Gold Precious Metals Premium Craft Foil has been cut using the Fleur de Flourish die template and embossed using the Keys Media Mixáge™ Texture Plate and the Artisan X-plorer Machine   I have embellished it using a Vintage Button, Glass Glitter and Want2Scrap© - Baby Bling.  Finishing off with ICE Resin®.

The bezel itself has Deco Art® Metallic Lustre applied to the raised edges using a
IMAGINECrafts®/Tsukineko® Fantastix™ Multi-Purpose Applicator.

Warning - created these Media Mixage projects is highly addictive - just sayin' LOL!
 

 Thank you for your comments and all of the support you give me - you make blogging such an amazing place to be!! Your encouragement is such a blessing for me - it makes my day! God bless you!

{{{Hugs}}}
Follow on Bloglovin

Wednesday, December 11, 2013

Spellbinders Winter Projects Tutorial


I am sharing the Step by Step Tutorial on the Spellbinders Blog - the theme this week is Winter Projects - a 'White Christmas' is not something we experience here in the Southern Hemisphere - but definitely something we dream of. I would love you to check out my Tutorial HERE and leave me a comment over there and let me know what you think. 

Thank you for your comments and all of the support you give me - you make blogging such an amazing place to be!! Your encouragement is such a blessing for me - it makes my day! God bless you! 
{{{hugs}}}
Follow on Bloglovin