}

Friday, July 31, 2015

Exotic Orchid

Hello Blog friends, it is Friday evening here and we are looking forward to the weekend - especially when a couple of warmer days are predicted as Canberra is cold and only 1.5 hours from the snow!  I hope you are looking forward to your weekend too!


Today's card has been created using the Orchid Spellbinders® Shapeabilities® Die D-Lites™ - from the Create-A-Flower Collection - these flowers are so much fun to create and so realistic.


You can see a tutorial to create the orchid HERE.  The patterned paper has been Diecut using the Victorian Medallion One.  A narrow tape measure ribbon has been added, along with a sentiment from Sentiments 3 Spellbinders® Shapeabilities® Die D-Lites™.  All Dies have been cut/embossed using the Grand Calibur Die Cutting and Embossing Machine.


This card is for the following challenges:
4 Crafty Chicks - Anything Goes
Crafting with an Attitude - Anything Goes 
Crafting By Designs - August Anything Goes
 House That Stamps Built - Anything Goes
Inspiration Destination - Always Anything Goes  
Mod Squad Challenge - Anything Goes PLUS a DIE
STAMPlorations Anything Goes Challenge
Simon Says Stamp - Anything Goes
Simply Create Too Challenge - Anything Goes
Artistic Inspirations - Anything Goes

Thank you for your comments and all of the support you give me - you make blogging such an amazing placeto be!!   Your encouragement is such a blessing for me - it makes my day! God bless you!

{{{Hugs}}}
Follow on Bloglovin

Thursday, July 30, 2015

Happy Everything

Hello Blog Friends - it feels like ages since I have posted - the days are flying by, but I could not let today go past without sharing a quick post with you.  This card has been created using those things that gather (endlessly) on my desk - love it when it all comes together!


I have used Spellbinders 5 x 7 Enchanted Labels Twenty Eight Spellbinders® Nestabilities® Card Creator , which has been cut using the Grand Calibur Die Cutting and Embossing Machine.    Want2Scrap© bling has been added -  I love to have little points of interest on a project,  I have also used Scrapbook Adhesives by 3LEZ Runner and 3D foam squares.  The sentiment is from Penny Black Inc. and has been stamped using Imagine Crafts 'featuring' TsukinekoMemento Ink in Rhubarb Stalk - a favourite colour in this range,

This card is for the following challenges:
Use Your Stuff Challenge - Anything Goes
Mod Squad Challenge - Anything Goes PLUS a DIE
Love To Scrap Challenge - Anything Goes
Shopping Our Stash - Diamonds are a Girl's Best Friends
Eureka Stamps Challenge - Anything Goes
Whoopsi Daisy -  Bling It On
Crafty Time - Punches or Dies
Card Mania Challenge - Anything Goes

Thank you for your comments and all of the support you give me - you make blogging such an amazing place to be!! Your encouragement is such a blessing for me - it makes my day! God bless you!
{{{Hugs}}} and happy crafting!!

Monday, July 27, 2015

Want2Scrap - Perfectly Pink Pearls


I have a card LIVE on the Want2Scrap© Blog - it is pretty, feminine and covered in pink pearls.


I would love you to pop over to the Want2Scrap© Blog  and check our my project and leave a comment over there letting me know what you think - you can find it HERE.

Thank you for your comments and all of the support you give me - you make blogging such an amazing place to be!! Your encouragement is such a blessing for me - it makes my day! God bless you!

{{{Hugs}}}

Friday, July 24, 2015

'Tag It' with Want2Scrap Nestabling

I have a card LIVE on the Want2Scrap© Blog - using some of the fabulous Nestabling


I would love you to pop over to the Want2Scrap© Blog  and check it out - and leave a comment over there letting me know what you think - you can find it HERE.

Thank you for your comments and all of the support you give me - you make blogging such an amazing place to be!! Your encouragement is such a blessing for me - it makes my day! God bless you!

{{{Hugs}}}

Spellbinders No Borders and Outrageous Tutorial

Hello Blog friends - it is time for my next Spellbinders Step by Step Tutorial. I have taught a few Workshops lately where I have used the two Step Dies - and don't we love them!!  I thought I would show you how to create a pretty card that uses only the insert and not the outer cutting edge.....


The result is so pretty and elegant - follow along with the tutorial to see how it is done - simple as 1-2-3 and will give you more versatility with these Dies.

Spellbinders Products:
Cross Promotional Partners:
Other:  Patterned Paper; White Mulberry Paper Rose; Derwent Kindy Glitz/Shimmer; SandingBlock


1. Cut/emboss one (1) Gold Majesty Circle #5 (#1 being the smallest) using patterned paper
2. Lightly sand the embossed areas using a Sanding Block
3. Trim the patterned paper around the Gold Majesty Circle Diecut insert as shown in the photo above


4. Cut/emboss Outrageous Butterfly using patterned paper
5. Cut/emboss the sentiment using Whirl White
6. Adhere Outrageous Butterfly to the Gold Majesty Circle using liquid glue
7. Adhere Mulberry Paper Rose to the center of the butterfly and shimmer to the wings


8. Cut/emboss two (2) Pierced Rectangles #5 #6 (#1 being the smallest) using Whirl White cardstock
9. Score one Pierced Rectangles at approx 1/2" and fold forward
10 Attach the front layer to the scored layer to form card base.
11 Adhere the layered Dies to the card base using double sided tape


12 Adhere pearls as shown in the main photo

Thank you for your comments and all of the support you give me - you make blogging such an amazing place to be!! Your encouragement is such a blessing for me - it makes my day! God bless you!
{{{Hugs}}} and happy crafting!!

Monday, July 20, 2015

Birthday Robot

Hello Blog Friends, I am popping in to say hello and share a 'whimsical' card.  I have to say - 'how cute is this robot!?!'  When I saw it I just had to have it - it really is my first 'little boy' stamp and I cannot wait to use it more...


The image has been coloured using Chameleon Pens - it is so easy to get the different shades of one colour in one pen - it doesn't get much easier!!  The background paper is from Anna Griffin Inc and is so versatile. The robots head and body have been stamped for a second time and once coloured, they have been hand cut and popped up onto Scrapbook Adhesives by 3L3D Foam Squares.


This card is for the following challenges:
Amusing - W, 2E, no digi -  Anything Goes 
A Gem of a Challenge - birthday wishes 
My Sheri Crafts - child's birthday 
Artbymiran Challenge - Anything Goes
Card Mania - Anything Goes
Crafting Musketeers - Anything Goes
Sweet Stampin' Challenge - No Designer Paper

Thank you for your comments and all of the support you give me - you make blogging such an amazing place to be!! Your encouragement is such a blessing for me - it makes my day! God bless you!

{{{Hugs}}} and happy crafting!!

Friday, July 17, 2015

Spellbinders Paper Roses Tutorial

Hello Spellbinders fans, I am sharing a Step by Step Tutorial on the Spellbinders Blog using some of my favourite Dies - it makes it so-o-o easy.  I have been a little time challenged lately with some BIG Spellbinders Workshops happening and others to prepare for - not to mention our darling new grandson - who at 11 weeks is nothing but adorable and my biggest distraction! LOL!  


Needless to say my creative time has been a little less but I can't resist my Spellbinders Dies for too long - and today I am sharing a pretty card that is so simple to create and still very elegant - you have to love that don't you - lets face it - we all have 'real life' moments that take us away from our Studios/Craft Rooms....

Spellbinders Products:
Cross Promotional Partners:

Other:  Seam Binding; paper flowers

1. Cut/emboss one (1) Fleur de Elegance #3 (#1 being the smallest) in Whirl White cardstock

2. Cut/emboss one (1) Triple Tear #3 #4 (#1 being the smallest) using Pixie Play cardstock.  Placing #3 inside #4 to create a frame.
NOTE: It is advised to use repositional tape to hold the dies securely

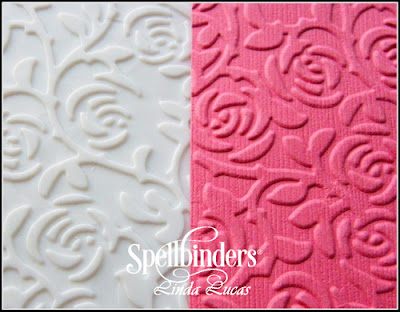
3. Emboss Captivating Coral cardstock using Cabbage Roses M-Bossabilities™ folder
4. Trim to size (4¼ x 5½”) and adhere to slightly larger white card base using Crafty Foam Tape
5. Adhere Fleur de Elegance using Crafty Foam Tape
6. Adhere Triple Tear using Crafty Foam Tape

5. Attach the Diecut Embellishments using 3D Foam Squares, popping leaves over the frame
6. Add Seam Binding around the front of the card adhering in the center using liquid glue
7. Adhere double seam binding bow over the join
8. Attach flowers using liquid glue
9. Adhere pink pearls as shown in the main photo

Designer Hint:  Cut more than one Die each time you create and put the extra ones aside for those times you need to create something quickly - you won't regret it!

I told you it was easy didn't I!!  I hope you are inspired to create your own cards - even when you are time challenged - it does not have to take long with Spellbinders Dies - as you can see
Thank you for your comments and all of the support you give me - you make blogging such an amazing place to be!! Your encouragement is such a blessing for me - it makes my day! God bless you!
{{{Hugs}}} and happy crafting!!

Wednesday, July 15, 2015

International Ambassadors 'Anything But a Card' Unofficial Blog Hop

Welcome to the International Ambassadors Unofficial 'Anything But a Card' Blog Hop!  As you may have caught on the International Ambassadors are getting together to 'play' with Spellbinders Dies every month and it comes around so quickly - this Blog Hop is purely for fun and inspiration, totally unofficial and an opportunity for you to get to know us (and our styles) more.


This month we are creating 'Anything But a Card'

Spellbinders Products:
Cross Promotional Partners:

Other:  Lace flowers, handmade resin embellishments,


1. Cut/emboss Belly Band Two # 1 #2 #3 using white cardstock (#1 being the smallest)
2.Cut each using scissors, at the desired length


3. Using the Die as a stencil, sponge inside the die using Teal Zeal ink and a Sponge Dauber
4. Before removing the Die, lightly stamp the music using Bamboo Leaves
5. Remove the Die
6. Thread the ribbon through the Die Cut slots.


9.  Adhere the Die cut label to the tin using liquid glue
10 Thread ribbon through the second slot and adhere underneath the label
11 Adhere lace flowers using liquid glue
12 adhere ribbon across the lower portion of the label as shown
13 Attach resin embellishment using liquid glue
14 Add White Pearls to the butterfly body
15 Add stickers to the label


I have used:


hope you have enjoyed my tutorial, make sure you pop in and visit the other International Ambassadors - these girls are amazing - each one is picked to be an Ambassador for their country because they are seasoned designers and so inspiring!!  The list of International Ambassadors is below, in case you get lost along the way.


Linda Lucas - Australia (you are here)
  Yvonne van de Grijp - Netherlands
Christine Emberson - England

Thank you for your comments and all of the support you give me - you make blogging such an amazing place to be!! Your encouragement is such a blessing for me - it makes my day! God bless you!
{{{Hugs}}}