}
Showing posts with label May Arts. Show all posts

Friday, March 31, 2017

Spellbinders Baby Boy

Hello friends - there is something about making baby cards - is it the fact that they are one of the cards people seems to keep, along with Wedding cards?  I do love the create them and adding lots of special details.  This may be the only time that you can make cards for males pretty and even add a bow! LOL!


I have cut/embossed the card base using Spellbinders Romantic Rectangles 2 and Platinum 6 Die Cutting and Embossing Machine - 6" Platform..  The patterned paper has been cut to size and popped up onto the card base using  Scrapbook Adhesives by 3L 3D Foam Squares.


The image is from my stash and has been coloured using Chameleon Pens.  This has been fussy cut/hand cut using scissors and adhered to a Standard Circle LG using Scrapbook Adhesives by 3L E-Z Adhesive Runner, then popped up onto a Die from  Spellbinders Fleur de Elegance and frame from the Silhouette Die D-Lite.


The sentiment is from the Darkroom Door  Hello Baby stamp set and stamped using Imagine Crafts Memento Ink in Tuxedo Black.  This has been cut and layered onto a strip of the patterned paper and then onto the layered card base.  The gorgeous sheer double bow is created using May Arts Ribbon.

This card is linked to the following challenges:
Simon Says Stamp - Anything Goes
Crafty Sentiments Challenge - Anything Goes
As You Like It Challenge - Favourite Colouring Medium (and Why) Chameleon Pens - self blending and so many colours in one pen.
Aud Sentiments Challenge - Any Sentiment Except For Birthday
Die Cuttin' Divas - Anything Goes
The Paper Nest Dolls Challenge - Always Anything Goes
Dare 2B Artzy Challenges - Lots of Layers
heARTful Stamping Challenge - Anything Goes + Stamp
Brown Sugar – Anything Goes
Jo's Scrap Shack - Anything Goes
Making Memories Crafting - Add Some Layers

Take care friends - thank you for your comments and all of the support you give me - you make blogging such an amazing place to be!! Your encouragement is such a blessing for me - it makes my day! God bless you!

{{{Hugs}}} and happy crafting

Friday, September 2, 2016

Home is Where the Heart Is

Hello Flourishes Friends! Welcome to the first Flourishes LC September Challenge (and my very first post as a Senior Designer) where Vicki has challenged us to use Gold on our cards.  Not  a hard challenge for me - I love to use gold ink - such a lovely warm glow.  If you have come from Beverly's Blog you are in the right place.


I stamped the  image onto Flourishes Classic White card stock using black ink and coloured using watercolour markers.  This has then been cut out using an oval Die, which has been used as a stencil before removing the card stock, by sponging using gold ink and a sponge dauber.  I have to say - doesn't that chair look so comfy - I could spend many hours there - on a veranda or under a tree.


The Oval has then been popped up using  3D Foam Squares to give it dimension onto embossed card stock that has also been inked with gold ink - this time I used a brayer - it works so well on embossing, I like the crisper finish it has,  The sentiment has also been stamped using black ink an diecut, sponged with gold ink and popped up on 3D Foam Squares. I have finished off with some gorgeous blue ribbon, a button and twine.


Please check out the other great designs from the rest of the Design Team - the next stop along the way is Nancy.

Linda Lucas - You are here

I am looking forward to seeing you each Friday in September, as a part of a weekly Flourishes LC Friday Hop, from now on - so much inspiration and you are going to LOVE what each Designer is sharing!

Take care friends and Thank you for your comments and all of the support you give me - you make blogging such an amazing place to be!! Your encouragement is such a blessing for me - it makes my day! God bless you!

{{{Hugs}}} and happy creating
                            

Friday, December 18, 2015

Christmas Is...

Hello friends -  The Christmas Countdown is officially on - one week until Christmas Day!!!  Thank you to all those who commented on my previous  Christmas Card - if you have not seen it, you can find it HERE.  I have another one to share today - I hope you like this one as much.  I have to say I adore traditional Christmas colours but am really enjoying something a bit different.

My card today has been created using some discontinued products - but they are too gorgeous to pass up - My Dies have been cut using  the Spellbinders  Platinum Die Cutting and Embossing Machine.  My card is held together by Scrapbook Adhesives by 3L.  My bling is from Want2Scrap    


The sentiment  is from Our Daily Bread Designs and  has been stamped using Imagine Crafts ‘featuring’ Tsukineko Ink. The fabulous silver paper is from Kaisercraft.  The sheer ribbon is from May Arts and the flowers are recycled from an artificial arrangement - I love these flowers and always recycle when they have 'had their day!'


 This card is linked to the following challenges:
Cardz 4 Galz - Christmas
Craft Rocket Challenges - Anything Goes
Crafting With An Attitude - Anything Goes
Crafty Girls Creations - Always Anything Goes
In The Pink - Pink Christmas
Scrap & Craft Challenges - Anything Christmas
Star Stampz Challenge - Christmas Creations 
Crafting By Designs - Anything Goes
Inspiration Destination - Always Anything Goes 
WordArt Wednesdays - Anything Goes
Artistic Inspirations - Anything Goes with Twist of Christmas
Creative Card Crew Holiday Season
Die Cuttin' Divas - Anything Christmas Goes
The Ribbon Girls - Christmas Card 
Art By Miran Challenge - Anything Goes

Thank you for your comments and all of the support you give me - you make blogging such an amazing place to be!! Your encouragement is such a blessing for me - it makes my day! God bless you!
{{{Hugs}}} and happy creating!

Sunday, November 1, 2015

Bird Song

Hello Blog Friends - I am sitting here listening to the rain, the occasional thunder roll and flash of lightning.  We love a good storm but don't get too many here in Canberra - so we try to make the most of them when they are here....there s nothing like going to bed and listening to the sound of rain on the roof - you know what I mean don't you!!?


I am sharing another card created using those bits on my desk - yes the pile does get smaller but you have to remember I add to it each day - so it is an endless battle - but I am not complaining! A lot of my product on this card has been sent to me in RAKs - Random Acts of Kindness - always so special to receive - thank you to those of you who have sent them - you know who you are - feel free to mention it when you comment!! 

I do have to add that this gorgeous bird image is from Crafty Secrets - it has been layered onto a preloved tag  and a button added to the side.


I am loving this ribbon from May Arts, the beautiful pearl swirls from Want2Scrap


This card is linked to the following challenges:
Simon Says Stamp - Anything Goes
Artbymiran Challenge - Anything Goes
Creative Fingers -  Always Anything Goes
4 Crafty Chicks - Anything Goes
Julia Spiri Challenge - Use Something Old
Creative Moments -  Always Anything Goes
Ruby's Rainbow - C10 -  Birds of A Feather 
WordArt Wednesdays - Anything Goes
Retarte - Anything Goes 

Thank you for your comments and all of the support you give me - you make blogging such an amazing place to be!! Your encouragement is such a blessing for me - it makes my day! God bless you!
{{{Hugs}}} and happy creating!

Friday, September 4, 2015

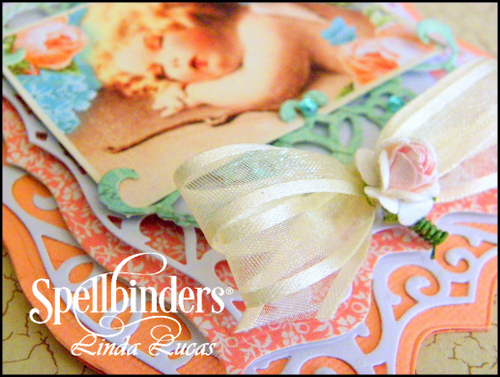
Spellbinders Sweet Layered Baby Girl Tutorial

Hello Blog friends - I am back with a Spellbinders Tutorial - I cannot get past baby cards at this time, again with lots of layers. Today's card is created using layer, using one of the Labels Nestabilities and the co-ordinating Decorative Elements - I have added one extra Die to the mix - scroll on down where you will find out which one and see all of the products listed!  


Spellbinders Products:
Preferred Partners Products:
Other: Seam Binding, Mulberry Paper Rose

1. Cut/emboss two (2) #5 Labels Forty  (#1 being the smallest) using Grand Calibur and peach cardstock
2. Score one  Labels Forty at approx 1/2" and fold forward
3. Attach the front layer to the scored layer to form card base.
4. Cut/emboss one (1) #4 Labels Forty (#1 being the smallest) using Graphic 45 patterned paper
5. Cut/emboss one (1) #3 and #4 Labels Forty Decorative Elements (#1 being the smallest) using Whirl White cardstock
6. Adhere the layered Dies to the card base using double sided tape

7. Cut/emboss two (2) Corners and Accents One #3 (#1 being the smallest) in turquoise paper
8. Adhere to the top and bottom of the Precious Memories image, using liquid glue, tucking some swirls behind as shown in the photos above
9. Pop framed image onto the layered base using 3D Foam Squares

10 Adhere a double white Seam Binding bow to the center of the image using liquid glue
11 Attach the Mulberry Paper Rose to the center of the bow using liquid glue
12 Add turquoise Baby Bling around the Corners and Accents One Dies as shown in the main photo.

Thank you for your comments and all of the support you give me - you make blogging such an amazing place to be!! Your encouragement is such a blessing for me - it makes my day! God bless you!
{{{Hugs}}} and happy creating!

Thursday, August 20, 2015

Best Bunny Wishes

Hello Blog Friends - I want to say thank you to you all for popping over and visiting - I always love to see you have been - for those of you who leave a comment - thank you again - I know it can be time consuming, it always means to much!  To my new followers - welcome - I hope this is a place you will feel 'at home' and be inspired....


Today's card is created from a tag I had leftover from my daughters Baby Shower - I thought that it would make a cute juvenile birthday card - the sentiment could make it work for a few different occasions - don't you think!?


The adorable Bunny Die is from Spellbinders - but you knew that didn't you! LOL!  The tag is from one of my favourite Core Dies - Labels Seventeen and the stamped image is the gorgeous Doily Fun - also from Spellbinders - who doesn't love a doily - right!!


The two layer flower is from the Pretty Petals A - this and all of my Dies have been cut using the Grand Calibur Die Cutting and Embossing Machine.  The ribbon is from May Arts.  I have also useScrapbook Adhesives by 3L:  E-Z Adhesive Runner and 3D Foam Squares

This card is for the following challenges:
Inspiration Destination - Always Anything Goes  
Moo-Mania & More - Embellishments
Crafty Sentiment Designs - Anything Goes
Shopping Our Stash - Layer It On Me
Artistic Inspirations - Anything Goes
Craft Your Passion - Always Anything Goes
Use Your Stuff - Anything Goes
2 Creative Chicks - Anything Goes 
Crafts Galore Encore - Anything Goes
Ladybug Crafts - Special Birthdays
Paper Creator's Crafts - Dies or Punches
613 Avenue Create - Anything Goes
Great Impressions - Add a sentiment

Thank you for your comments and all of the support you give me - you make blogging such an amazing place to be!! Your encouragement is such a blessing for me - it makes my day! God bless you!
{{{Hugs}}} and happy crafting!!

Wednesday, August 19, 2015

International Ambassadors Unofficial Christmas in August Blog Hop

***This post will remain at the top of the Blog while the Blog Hop is on - please scroll down for new posts***

Welcome to the International Ambassadors Unofficial Christmas in August Blog Hop - you have heard of Christmas in July - who says it has to stop there - we are extending it to August and are excited to be sharing some of the new Spellbinders Holiday Dies

The International Ambassadors love to get together and create - and love it that so many of you hop along with us - I hope you enjoy what we are sharing today!!  This Blog Hop is purely for fun and inspiration, totally unofficial and an opportunity for you to get to know us (and our styles) more.

Spellbinders Products:


Cross Promotional Products:
Other:  Indigo Blue - Merry Christmas Circle Dinkie; Felt and Bling embellishment; Diamante button; Gold Cardstock


1. Cut/emboss one (1) Decorative Holly Frame #3 (#1being the smallest) using Gold cardstock
2. Score 6"x12" Cuddle Cream cardstock halfway
3. Cut/emboss Cuddle Cream cardstock using 6x6 Matting Basics B #  (#1 being the smallest) making sure the folded edge is inside the cutting live of the Die to form the card base.
4. Adhere the filigree frame from the Decorative Holly Frame to the card base
5. Pop the Labels Seventeen insert up on D Foam Squares into the Decorative Holly Frame.


6. Cut/emboss one (1) Labels Seventeen # (#1 being the smallest) using Cuddle Cream cardstock.
7. Sponge around the inside edge of the Labels Seventeen using Delicata Golden Glitz Ink and a Sponge Dauber.


8. Cut/emboss Poinsettia flower Dies #1 #2 #3 #4 along with two (2) leaves in cream cardstock.
9. Sponge the flowers using Rhubarb Stalk before removing them from the Dies.
10 Using the Stylus to shape the flowers - make sure you are using a foam mat/pad.
11 Layer the flowers, later the flowers, offsetting the petals to give a more natural look - using liquid glue
12 Adhere to the left side of the Labels Seventeen Die using a 3D Foam Square
13 Sponge the leaves using Delicata Golden Glitz before removing from the Die
14 Adhere the leaves on the lefthand side of the flower using liquid glue - tucking the ends under the layered flower.


15 Stamp the sentiment twice using Indigo Blu sentiment and Rhubarb Stalk
16 Cut/emboss one sentiment using Standard Circles 3 # (#1 being the smallest)
17 Cut emboss the inner circle using the Standard Circles #2
18 Sponge the inside edges of the Circles using Delicata Golden Glitz and a sponge dauber
19 Layer the smaller circle onto the larger one using 3D Foam Tape.
20 Adhere the layered sentiment to the right side of the flower.
21 Attach gold ribbon along the lower portion of the card using double sided tape
22 Attach gold double sided bow to the center of the gold ribbon using liquid glue
23 Adhere embellishment to the center of the bow and smaller one to the center of the layered flower
24,Attach Swirls Finesse - LeCreme either side of the layered flower


hope you have enjoyed my tutorial, make sure you pop in and visit the other International Ambassadors - these girls are amazing - each one is picked to be an Ambassador for their country because they are seasoned designers and so inspiring!!  The list of International Ambassadors is below, in case you get lost along the way.

  Yvonne van de Grijp - Netherlands
Christine Emberson - England
Linda Lucas - Australia (you are here)

Thank you for your comments and all of the support you give me - you make blogging such an amazing place to be!! Your encouragement is such a blessing for me - it makes my day! God bless you!
{{{Hugs}}}